
1TM 5-5420-226-20-3
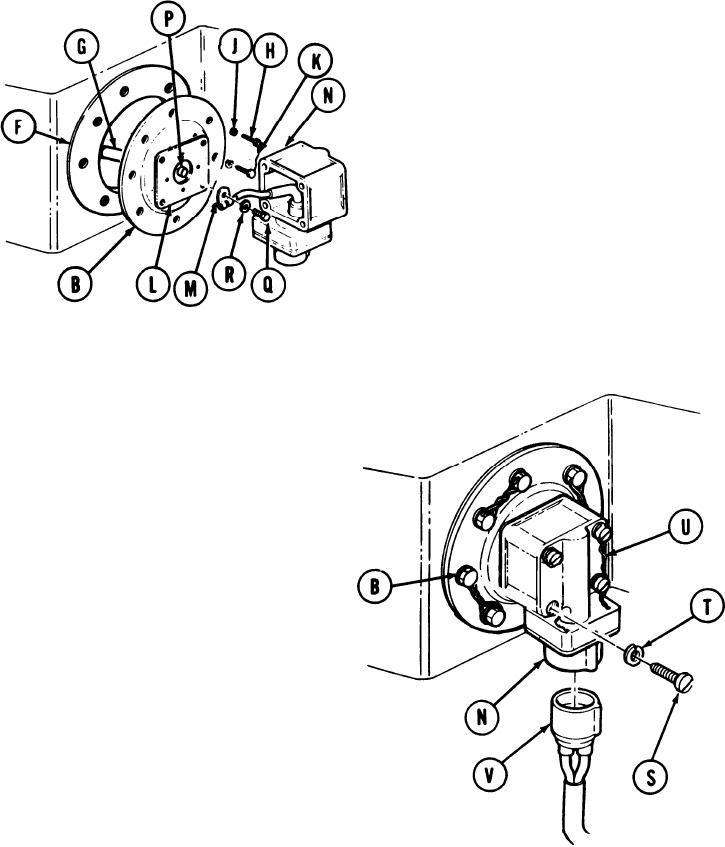
FUEL TANK CAPACITOR AND HOUSING ASSEMBLY REPLACEMENT (RIGHT)
(Sheet 4 of 5)
3. Position new gasket (F) between cover
and fuel tank.
4. Position cable (G) attached to rear of
cover (B) through gasket (F) and lay in
fuel tank.
5. Using socket, install eight screws (H)
and washers (J) securing cover (B) to
fuel tank.
6. Using torque wrench, tighten screws (H)
to 50 to 85 lb-in (6 to 10 Nm).
7. Using slip-joint pliers, install lockwire
(K) through screws (H).
8. Position new gasket (L) to cover (B).
9. Using screwdriver, secure electrical lead
(M) of housing and capacitor (N) to adapter
(P) with screw (Q) and washer (R).
10. Position capacitor and housing (N) onto
cover (B).
11. Using screwdriver, install four screws
(S) and washers (T) securing capacitor
and housing (N) to cover (B).
12. Install lockwire (U) onto screws (S).
13. Using fingers, install cable (V) into
electrical connection on capacitor and
housing (N) by pushing in.
Go on to Sheet 5
TA168970
10-319

