
TM 5-5420-226-20-3
BRAKE CONTROL HOUSING REPAIR (Sheet 11 of 14)
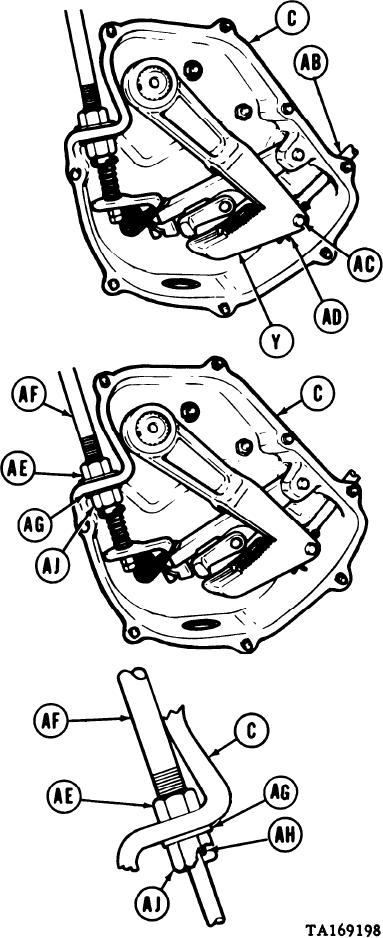
23. Insert push rod(AB) through hole in housing
and position in clevis of lever (Y).
24. Insert pin (AC) and, using pliers, install
new cotter pin (AD).
25. Thread nut (AE) all the way on control assembly
(AF) to provide enough threads for parts (AG
thru AJ).
26. Insert end of control assembly (AF) through
hole of housing assembly (C).
27. Place new packing with retainer (AG) on control
assembly (AF).
28. Place new packing (AH) on control assembly
(AF).
29. Thread nut (AJ) on control assembly
(AF) tighten fingertight.
30. Using a 9/16 inch wrench on flats of control
assembly (AF) and 7/8 inch wrench on nut (AJ),
tighten nut until nut and packing bottom on
shoulder of housing assembly.
Go on to Sheet 12
13-74

