
TM 5-5420-226-20-3
OUTRIGGERS NO. 3, 4, 5, AND 6 REPLACEMENT (Sheet 6 of 7)
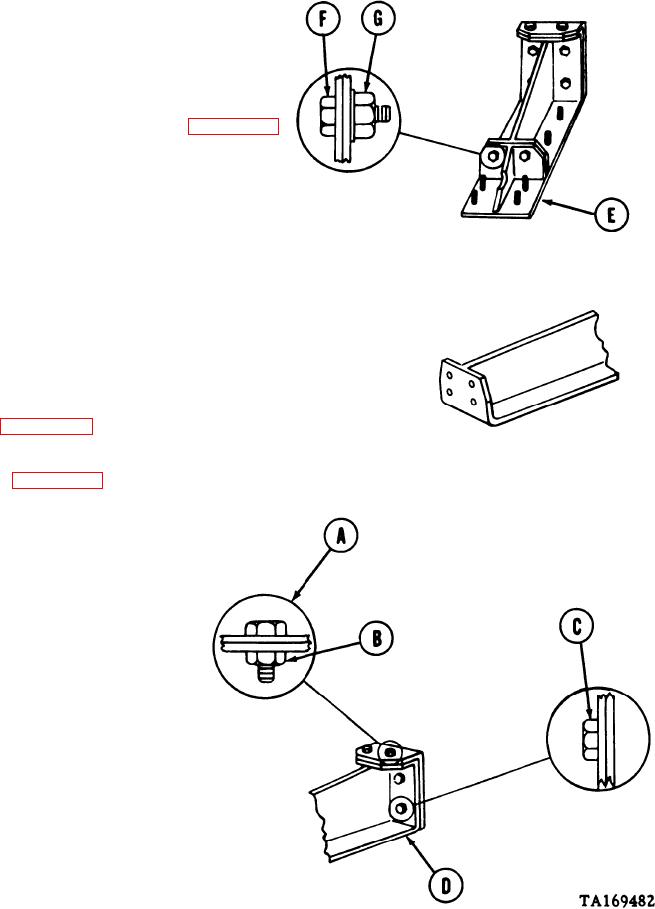
4. Position bracket (E) with holes alined.
5. Using two 3/4 inch wrenches, install three
screws (F), new locknuts (G).
6. Install rear fender stowage box (page 16-78).
7. Install air cleaner (page 7-93).
REMOVAL: OUTRIGGER NO. 6
Remove rear fender stowage box and fender
1.
plates (page 16-78).
Remove rear fender plate, shield, and
2.
support (page 16-57).
3.
Using two 3/4 inch wrenches, remove two
screws (A) and locknuts (B). Throw locknuts
away.
4.
Using 1-1/8 inch wrench remove four screws
(c).
Remove outrigger (D).
5.
Go on to Sheet 7

