
TM
5-5420-202-20-2
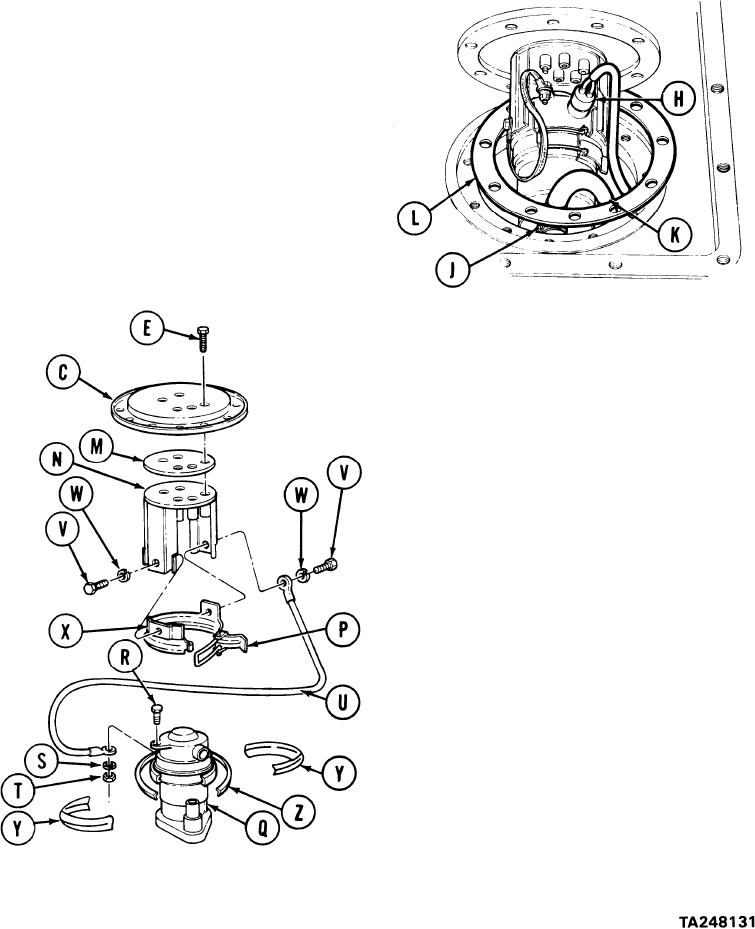
FUEL PUMP REPLACEMENT - RIGHT FUEL TANK (Sheet 3 of 6)
7.
Disconnect electrical connector (H)
by pulling out.
8.
U s i n g flat-tip screwdriver, loosen
hose clamp (J).
Remove hose (K) from fuel pump.
9.
NOTE
Use cloth to cover parts of fuel pump when
removing. Discard cloth in accordance with
local procedures.
10.
Remove gasket (L) from fuel tank opening
and throw away.
11.
Remove remaining screw (E) from access
cover (C).
12.
Separate access cover (C), gasket (M), and
mounting bracket (N). Throw gasket away.
13.
Using fingers, open clamp lever (P).
14.
Remove fuel pump (Q) from mounting
bracket (N).
15.
Using cross-tip screwdriver and wrench,
remove screw (R), lockwasher (S), and nut
(T) securing ground lead (U) to pump (Q).
16.
Remove ground lead (U) from pump (Q).
17.
Using 7/16 inch socket, remove two
screws (V) and lockwashers (W) securing
lead (U) and clamp (X) to bracket (N).
18.
Remove lead (U) and clamp (X).
19.
Using hands, remove two clamps (Y),
and packing (Z) from pump (Q).
Go on to Sheet 4
7-7