
TM 5-5420-202-20-2
FUEL TANK (LEFT) REPLACEMENT (Sheet 6 of 16)
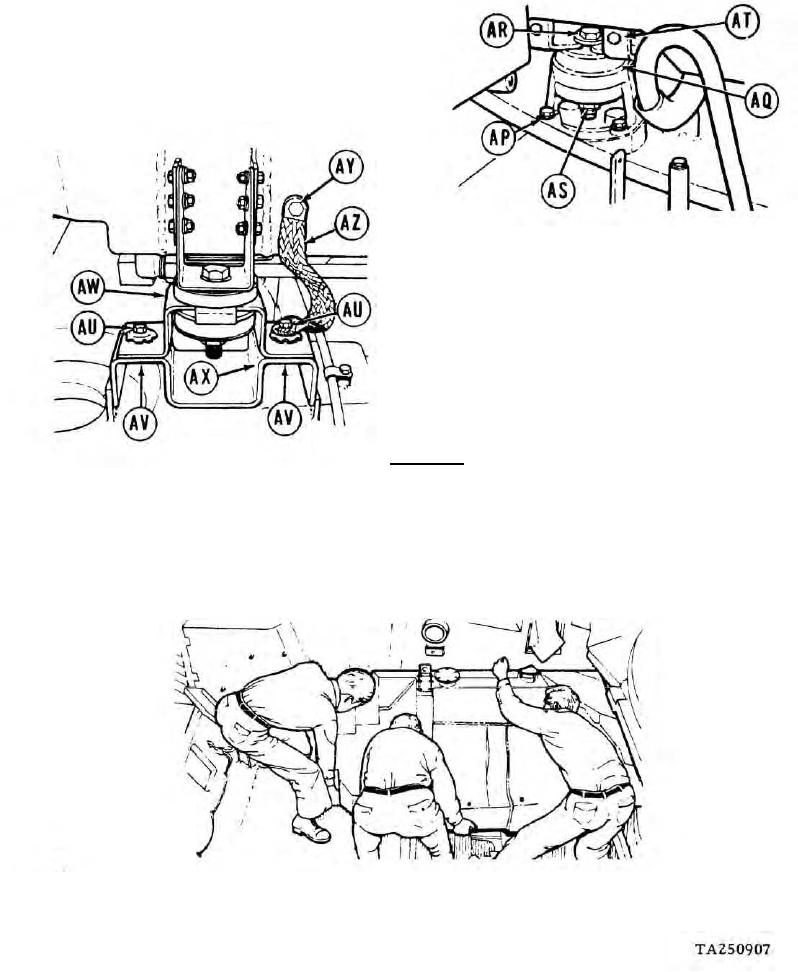
23.
Using 1/2 inch wrench, remove screws
and washers (AP) securing lower front
mount bracket (AQ) to hull floor.
24.
Using two 15/16 inch wrenches, loosen
screw (AR) and nut (AS).
25.
Rotate lower front mount bracket (AQ) 180
degrees and remove from fuel tank bracket (AT).
26.
Using 1/2 inch wrench and 1/2 inch socket,
remove two screws (AU) and nuts and
washers (AV) securing lower rear mount
bracket (AW) to hull bracket (AX).
27.
Using 9/16 inch wrench, remove screw and
two washers (AY) securing ground strap
(AZ) to fuel tank. Remove strap.
CAUTION
Fuel tank is fabricated of aluminum and is therefore
subject to damage from sharp objects. Use utmost
care during handling. Do not force fuel tank with
poles or bars as damage may result.
During disassembly several fuel tank openings may
be exposed. Cover these openings with masking
tape to prevent entry of foreign matter.
28.
Using three persons, pivot fuel tank toward center of hull while slowly moving fuel tank
toward rear, until rear end of fuel tank clears curve in hull.
Go on to Sheet 7
Change 5
7-353