
TM 5-5420-202-20-2
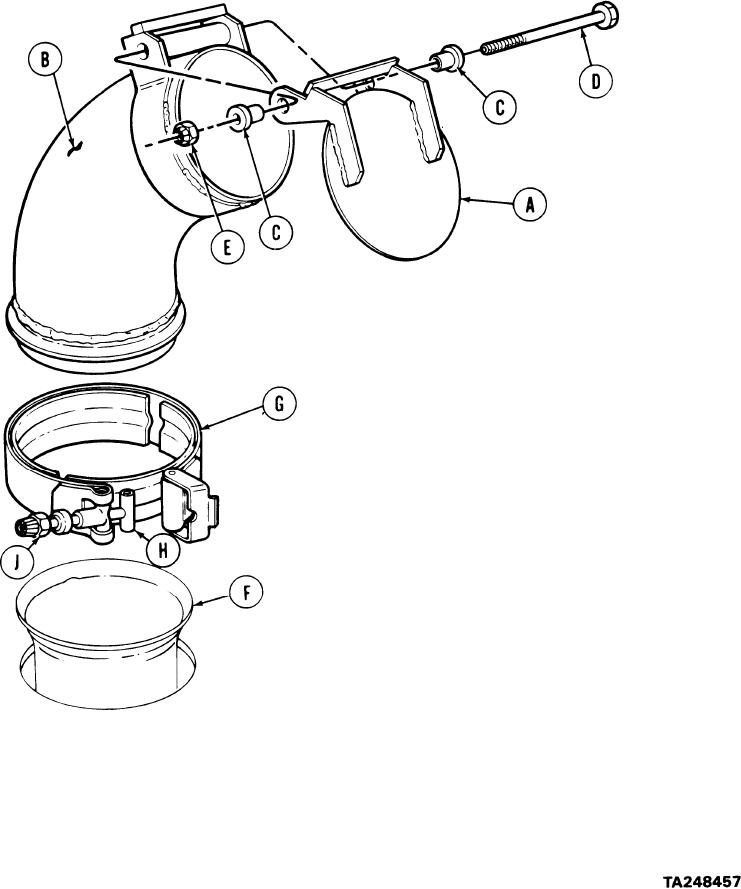
EXHAUST PIPE CAP ASSEMBLY REPLACEMENT (Sheet 3 of 3)
INSTALLATION:
Position tube cover (A) onto top of tube
1.
(B) with mounting holes of tube cover
(A) alined with mounting holes in tube
(B).
Insert two spacers (C) into holes in top
2.
of tube cover (A).
Insert bolt (D) through spacer (C), tube
3.
cover (A), tube (B), tube cover (A), and
spacer (C).
Start self-locking nut (E) onto bolt (D).
4.
Using two wrenches, tighten nut (E)
5.
to bolt (D).
Position notch at rear of tube
6.
(B) into notch of exhaust pipe (F).
7.
Position clamp (G) onto bottom of tube
(B) and exhaust pipe (F). Latch clamp
together with bolt (H).
Using wrench, tighten nut (J) on clamp
8.
(G) to hold tube (B) to exhaust pipe
(F).
Close engine exhaust doors (TM 5-5420-
9.
202-10).
End of Task
8-4