
TM 5-5420-202-20-3
HEADLIGHT ASSEMBLY REPAIR (LEFT AND RIGHT) (Sheet 7 of 8)
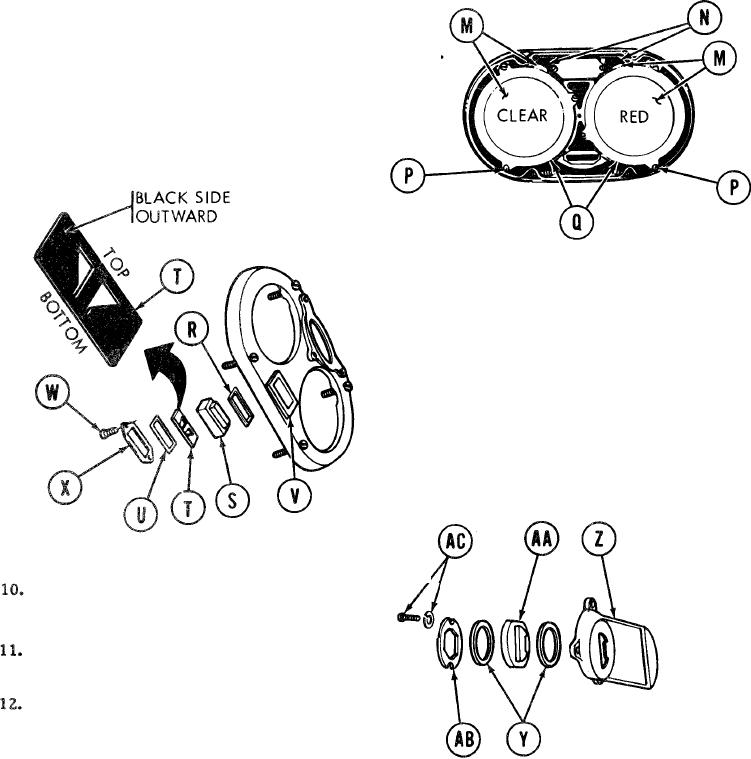
NOTE
Make sure red and clear lenses (M) are
positioned as shown.
6. Place headlight lens and seals (M) in notches
of' headlight cover (N) with rounded sides outward.
7. Using cross-tip Screwdriver install six screws
and lockwashers (P) and two retainers (Q) in
position over two lenses (M) arid tighten.
NOTE
Make sure filter (T) is positioned in
blackout marker cavity (V) properly.
8. Using fingers, install seal (R), lens (S), filter (T),
and seal (U) in blackout marker cavity (V).
9. Using cross-tip screwdriver, install two
screws (W) with assembled washers to secure
retainer (X).
Using fingers, install one seal (Y) in blackout
headlight shield (Z).
Using fingers, install blackout headlight lens
(AA) in position on blackout headlight shield (Z).
Using cross-tip screwdriver, install other seal (Y)
and retainer (AB) into headlight shell (Z) with
two screws and lockwashers (AC).
Go on to Sheet 8
TA249120
10-179