
TM 5-5420-202-20-2
AIR CLEANER REPLACEMENT (Sheet 6 of 8)
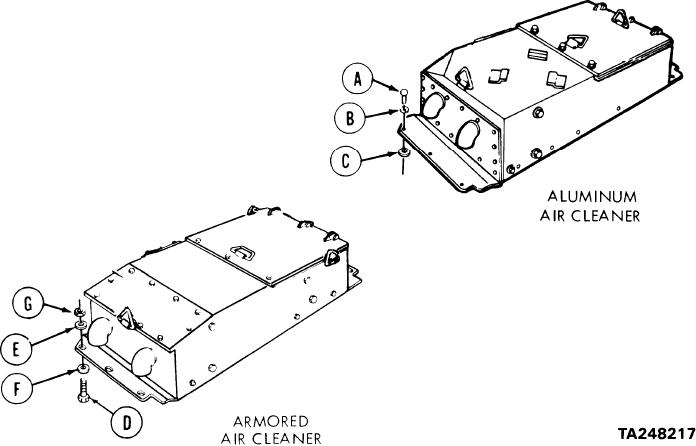
NOTE
If you are installing an aluminum air cleaner, do steps 3, 4, 5, and 6,
then go to steps 10 and 11. If you are installing an armored air
cleaner, go to step 7.
Before installing aluminum air cleaner, apply primer and locking compound to screw threads,
3.
lockwashers, and washers.
Using 9/16 inch socket, install six screws (A), lockwashers (B), and washers (C) to secure
4.
air cleaner to vehicle. Do not overtighten (screws must be torqued in following step).
Using 9/16 inch socket, torque wrench, and extension, tighten six screws (A) to 22 to 30
5.
lb-ft (28 to 47 N m).
If gap shows between air cleaner mounting flange and outrigger fender, remove screws
6.
and use washers (C) to fill gap and perform step 4 again.
NOTE
Use up to three washers (C) (as shims) for each bolt, if necessary,
to fill gap.
Before stalling bolts and nuts to air
7.
cleaner, apply primer and locking
compound to threads of nuts and bolts.
Using 15/16 inch socket, install six
8.
bolts (D), washers (E) and (F) and
nuts (G).
Using torque wrench and 15/16 inch
9.
socket, tighten six bolts (D) 85 to
95 lb-ft (115 to 129 N m).
G o on to Sheet 7
7-93