
TM 5-5420-202-34
TM 5-5420-202-20-2
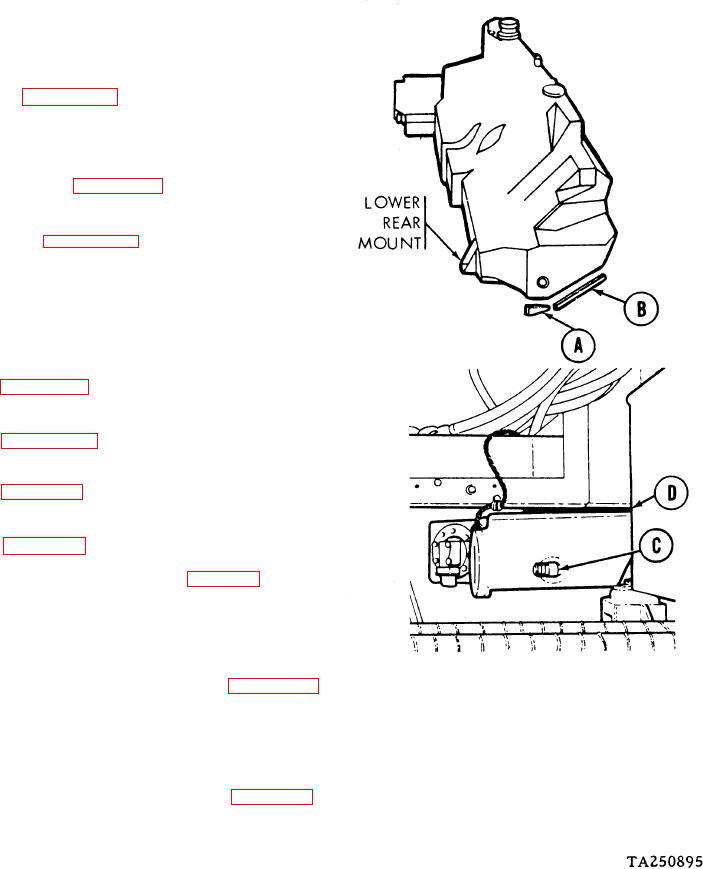
FUEL TANK (RIGHT) REPLACEMENT (Sheet 9 of 15)
INSTALLATION:
If required, use adhesive to install new seals
1.
(A) and (B) in marked position on hull.
NOTE
If fuel tank was removed for repair,
go to page 7-331. If fuel tank to be
installed is a new fuel tank, go to
step 2.
Install upper front mount bracket on
2.
fuel tank (page 7-391).
3.
Install upper rear mount bracket on fuel
tank (page 7-396).
Apply sealing compound to male threads of
4.
elbow (C) and, using adjustable wrench,
install elbow (C) in tank (D). Tighten to
position shown.
5.
Install fuel tank lower front mount
(page 7-387, steps 1 through 6).
Install fuel tank lower rear mount (pages
6.
(pages 7-379, 7-380, steps 1 through 9).
Install fuel tank upper front mount (page
7.
6 through 9
(page 7-392, steps 6 through 9).
8.
Install fuel tank upper rear mount (page
(page 7-396, steps 1 and 7).
Install right fuel pump (page 7-5).
9.
Install capacitor housing (page 10-326).
10.
11.
Install fuel level transmitter (page 7-141).
12.
Install air cleaner valve (page 10-164).
13.
Install air cleaner valve hose (page 7-85).
Go on to Sheet 10
Change 5
7-341
4-17