
TM 5-5420-202-20-4
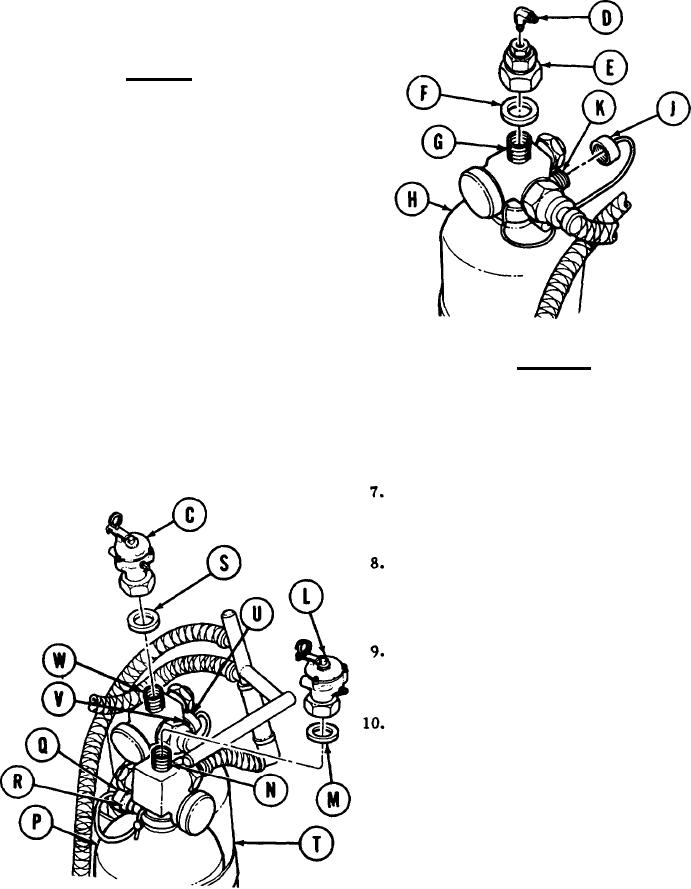
FIXED FIRE EXTINGUISHER CONTROL VALVE REPLACEMENT (Sheet 3 of 14)
Using adjustable wrench, remove elbow
4.
(D) from pressure head (E).
CAUTION
Immediately after removing each dis-
charge line, install protective cap to
cover exposed part. Use protective
caps stowed on dummy plugs at neck
of cylinder.
NOTE
Pressure head (E) must be removed
as one part even though it can be
disassembled.
Using 1-1/2 inch wrench, remove pressure
5.
head (E) and washer (F) from port (G)
on cylinder (H).
CAUTION
6. Using slip joint pliers if necessary,
Make sure bottle does not turn and
pull on discharge cable. Fire extin-
remove protective cap (J) from dummy
guisher will discharge.
plug (K). Using hands only, install and
tighten protective cap (J) on port (G).
Using 1-1/2 inch wrench, remove control
valve (L) and washer (M) from port (N)
on cylinder (P).
Using slip joint pliers if necessary, remove
protective cap (Q) from dummy plug
(R). Using hands only, install and tighten
protective cap (Q) on port (N).
Remove control valve (C) and washer
(S) from cylinder (T) using the same
procedure as step 7.
Using slip joint pliers if necessary,
remove protective cap (U) from dummy
plug (V). Using hands only, install and
tighten protective cap (U) on port (W).
TA248662
Go on to Sheet 4
20-4