
TM 5-5420-226-20-2
TM 5-5420-202-34
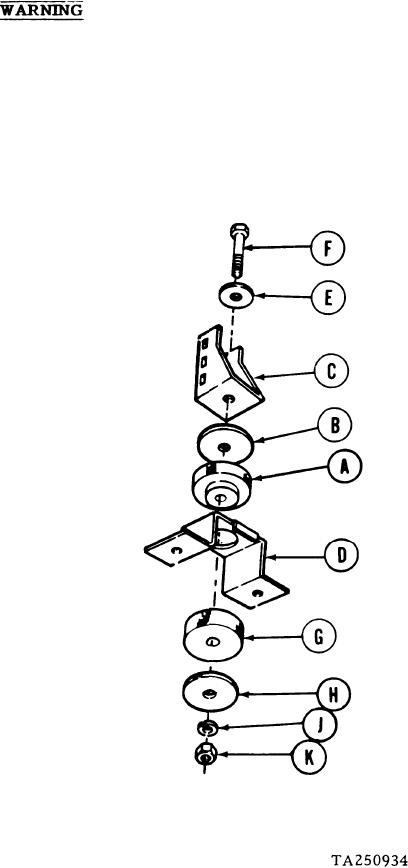
FUEL TANKS (LEFT AND RIGHT) LOWER REAR MOUNT REPLACEMENT (Sheet 3 of 4)
CLEANING AND INSPECTION:
Clean rubber mounts with detergent and water. Rinse clean with water.
1.
Dry cleaning solvent P-D-680 is toxic and flammable. To prevent personal
injury, wear protective goggles and gloves and use only in a well-ventilated
area. Avoid contact with skin, eyes, and clothes and don't breathe vapors.
Do not use near open flame or excessive heat. The flash point for Type #1
Dry Cleaning Solvent is 100F (38C) and for Type #2 is 138F (50C). If you
become dizzy while using cleaning solvent, get fresh air immediately and get
medical aid. If contact with eyes is made, wash your eyes with water and get
medical aid immediately.
Clean all metal parts with dry cleaning solvent. Wipe
2.
dry with rags.
Visually inspect rubber mounts for cuts, deterioration, or wear.
3.
Visually inspect metal parts for wear.
4.
5.
Replace unserviceable parts.
INSTALLATION:
1.
Install rubber mount (A) and washer (B)
between holding brackets (C and D).
2.
Insert screw (F) through washer (E) and
holding brackets (C and D), then install
rubber mount (G), washer (H), a new
lockwasher (J), and nut (K).
3.
Using 15/16 inch socket on screw
(F) and 15/16 inch wrench on nut
(K), tighten screw (F) and nut (K).
Go on to Sheet 4
7-44-57
19