
TM 5-5420-226-20-3
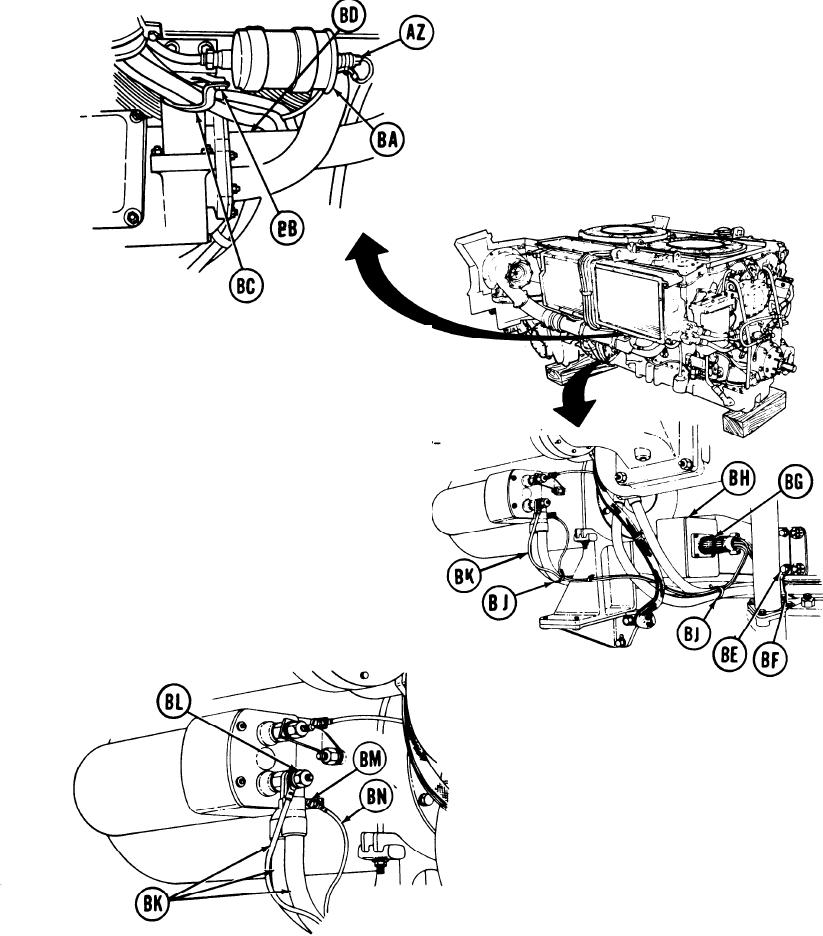
ENGINE WIRING HARNESS REPLACEMENT (Sheet 6 of 12)
39.
Using slip joint pliers, remove
electrical connector (AZ) from
ignition unit (BA).
Using 7/16 inch socket, remove two
40.
screws and lockwashers (BB) securing
clamp (BC).
41. Remove clamp.
42. Using 1/2 inch socket, remove nut (BD)
securing clamp (hidden).
43. Remove clamp.
44.
Using 1/2 inch socket with extension,
remove screw and lockwasher (BE) secur
ing clamp (BF).
45. Remove clamp (BF).
Using spanner wrench, disconnect
46.
electrical connector (BG) from low
voltage protection relay (BH).
47. Using cutting pliers, cut and remove
two plastic straps (BJ) from cables (BK).
48. Using 3/4 inch wrench, remove nut and
lockwasher (BL).
49. Remove three cables (BK).
50. Using flat-tip screwdriver, remove
screw (BM).
51. Remove electrical cable (BN).
52. Remove engine wiring harness from
engine.
TA168942
Go on to Sheet 7
10-291