
TM 5-5420-202-20-3
MASTER CONTROL PANEL REPAIR (Sheet 44 of 73)
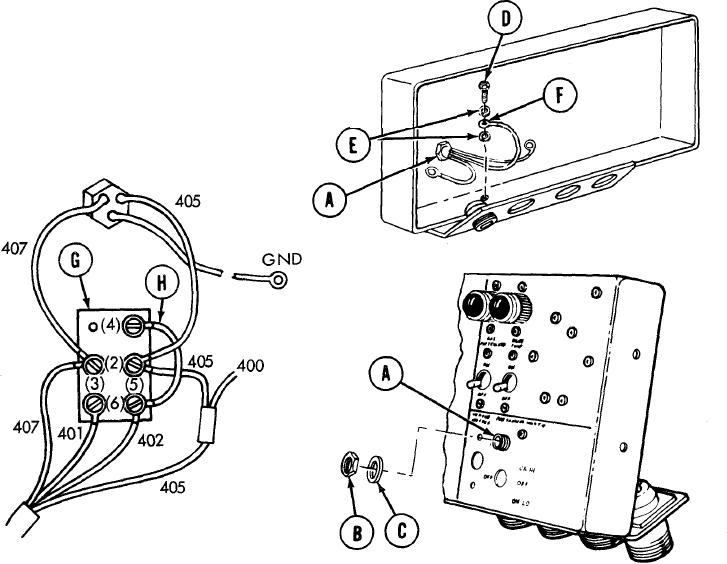
Master Heater Switch, Hi-Lo Switch And Indicator Light Replacement (Sheet 5 of 8)
INSTALLATION:
1. Place indicator light (A) in position through rear of panel.
Using socket, install nut (B), washer (C)
2.
securing indicator light (A) to panel.
3. Using cross-tip screwdriver, install and secure
screw (D), lockwashers (E), and ground lead (F)
to panel.
4.
Using flat-tip screwdriver, remove screws and washers
from terminals 2 through 6 of replacement hi-lo switch
(G). Retain screws and washers for installation.
5. Position electrical leads and jumper wire (H) to switch
(G) as shown.
NOTE
Electrical leads (circuits 407 and 405)
are part of indicator light (A).
6. Using flat-tip screwdriver, secure leads to terminals
with screws and washers removed in step 4.
TA249022
Go on to Sheet 6