
TM 5-5420-202-20-3
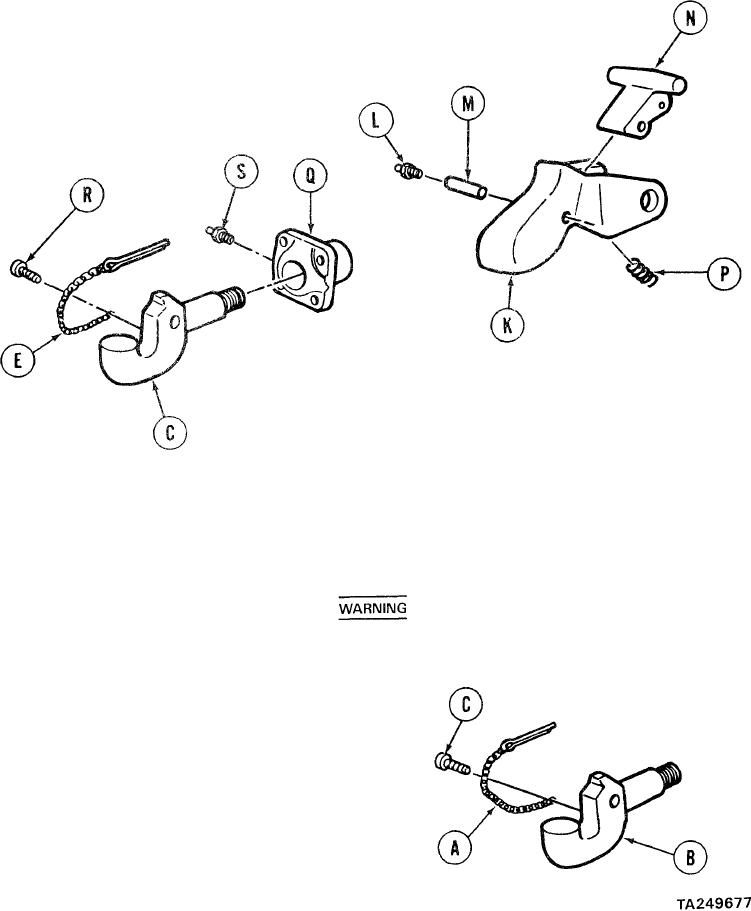
TOWING PINTLE REPAIR (Sheet 3 of 5)
Using 5/16 inch socket, remove fitting
10.
(L).
11.
Using hammer and 3/8 inch punch, remove
staked pin (M) securing latch (N) to
latch (K).
12.
Remove latch (N) and spring (P) from
latch (K) housing.
13.
Slide sleeve assembly (Q) off towing
pintle (C).
14.
Using screwdriver, remove screw (R) and
chain and cotter pin (E) from towing pintle
(C).
CLEANING
AND
INSPECTION:
1.
Inspect nuts and pintle for excessive
Using 5/16 inch socket, remove fitting (S).
15.
wear or stripping of threads. Replace
as required.
2.
Remove any deformed metal from around
cavity from which pin was removed.
Cleaning agent specified is flammable. Use only in well ventilated areas. Keep away from flames,
sparks, or heat. Do not smoke while using. Prevent contact with eyes, mouth and/or skin. Wear
rubber gloves when performing cleaning procedures.
3.
Wash lock cavity with dry cleaning solv-
ent and dry with low pressure compressed
air.
ASSEMBLY:
1.
Place chain ancl cotter pin (A) in install-
ation position on towing pintle (B).
2.
Using screwdriver, install screw (C) securing
chain and cotter pin (A) to pintle (B).
Go on to Sheet 4