
TM 5-5420-202-20-3
TOWING PINTLE REPAIR (Sheet 1 of 5)
PROCEDURE INDEX
PROCEDURE
PAGE
Removal
Disassembly
Cleaning and Inspection
Assembly
Installation
Grease gun, hand
TOOLS: 1-5/16 in. open end wrench
Ratchet with 3/8 in. drive
Hammer
3-1/4 in. socket with 1 in. drive
Flat-tip screwdriver
Ratchet with 1 in. drive
Center punch
1-1/2 in. socket with 3/4 in. drive
3/8 in. drive punch
1-5/16 in. socket with 3/4 in. drive
8 in. extension with 3/4 in. drive
60 in. pinchpoint crowbar
5/16 in. socket with 3/8 in. drive
Ratchet with 3/4 in. drive
Slip joint pliers
1-1/2 in. open end wrench
SUPPLIES:
Dry cleaning solvent (Item 55, Appendix D)
Gloves (Item 69, Appendix D)
Cotter pins
Goggles (Item 70, Appendix D)
Low-pressure air supply (30 psi maximum)
Lockwashers (4 required)
PERSONNEL
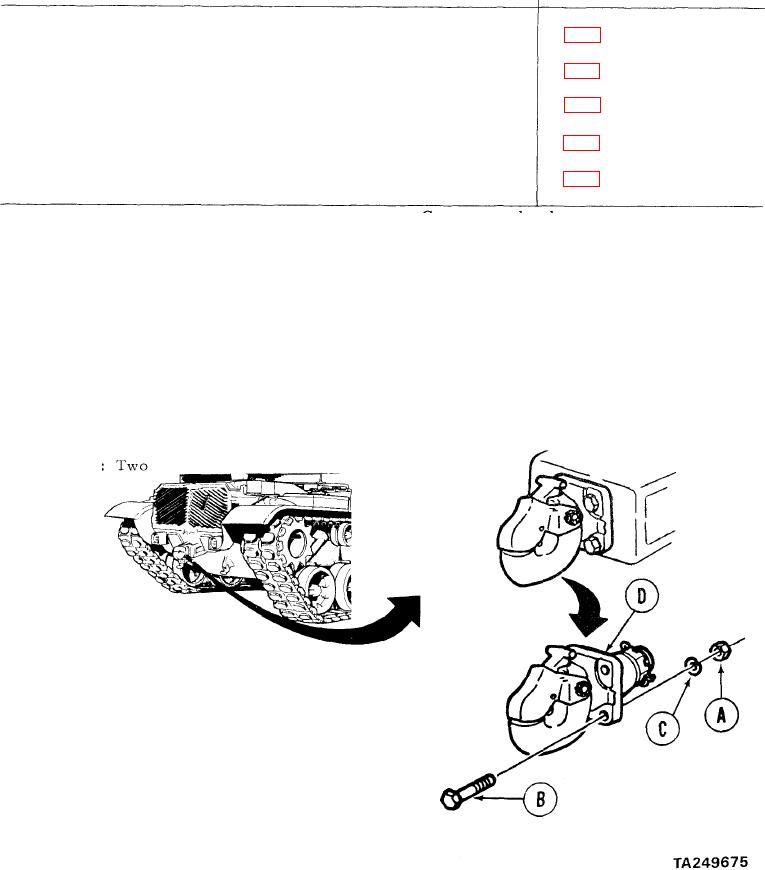
REAR OF VEHICLE
REMOVAL:
Place 1-5/16 inch wrench on each of
1.
the four nuts (A).
2.
Holding nut (A) with 1-5/16 inch wrench
and using 15/16 inch socket, remove four
bolts (B), lockwashers (C), and nuts (A).
3.
Remove towing pintle (D) from vehicle.
Go on to Sheet 2