TM 5-5420-202-34
FRONT STEERING LINK ASSEMBLY REPLACEMENT (Sheet 3 of 3)
INSTALLATION:
NOTE
Use grinder to cleanup old welds so new
assembly can be welded in place.
1.
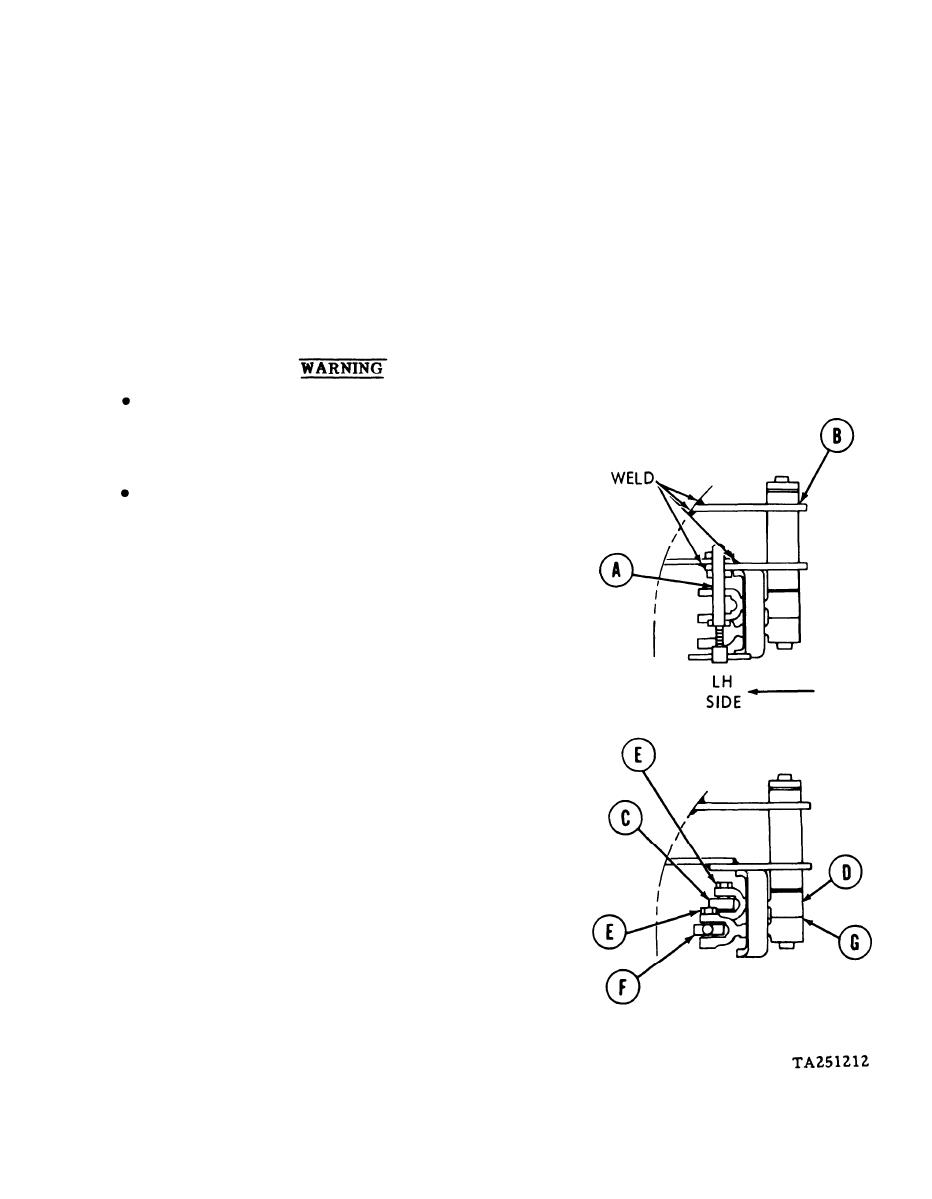
Using C-clamp (A), clamp new link assembly in place.
Use effective chip guarding and personal protective
equipment (goggles/shield, gloves, etc.) during cutting
and welding operations. Failure to do so could result in
personal injury.
Remove flammable materials, such as spilled fuel or oil
from immediate area. Place wet rags or nonflammable
cloth around area being welded. Follow safety proce-
dures as listed in TM 9-237 "Operator's Manual, Welding
Theory and Practice".
2.
Using electric welder, weld new link
assembly (B) in place (TM 9-237).
3.
Aline rod end (C) in link (D).
4.
Using 9/16 inch wrench, install bolt (E)
in link (D).
5.
Aline rod end (F) in link (G).
Using 9/16 inch wrench, install bolt (E)
6.
in link (G).
7.
Test operation of link assembly (B) (TM 5-5420-202-10
End of Task
10-19/(10-20
blank)


