
TM 5-5420-226-20-3
BRAKE CONTROL HOUSING REPAIR (Sheet 9 of 14)
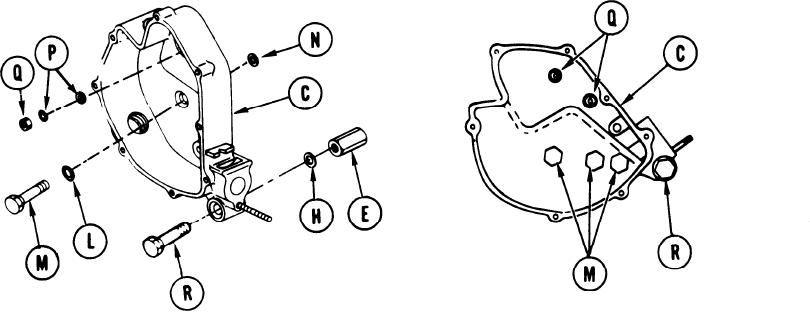
Place new packings (L) on three bolts (M) and insert bolts in housing assembly (C).
9.
10.
Place one shim (N) on each bolt (M) (on back side of brake housing (C)) in addition to
any shims added in step 6.
11.
Carefully position housing assembly (C) on transmission and start each bolt (M). Tighten
finger tight.
12.
Place a flat washer and lockwasher (P) and nut (Q) on each of two studs. Tighten finger
tight.
13.
With housing assembly (C) firmly positioned, insert as many shims (H) as necessary to
fill gap between brake housing and spacer nut (E).
14.
Insert bolt (R) (no packing under head) and tighten finger tight.
15.
Using torque wrench, extension, and 9/16 inch socket, tighten two nuts (Q) to 20-25 lb-
ft (27-34 Nm).
Using torque wrench, extension and 15/16 inch socket, tighten three bolts (M) to 55-60
16.
lbft (74-81 Nm). Tighten bolt (R) to 20-25 lb-ft (27-34 Nm).
Go on to Sheet 10
TA169196
13-72