
TM 5-5420-226-20-3
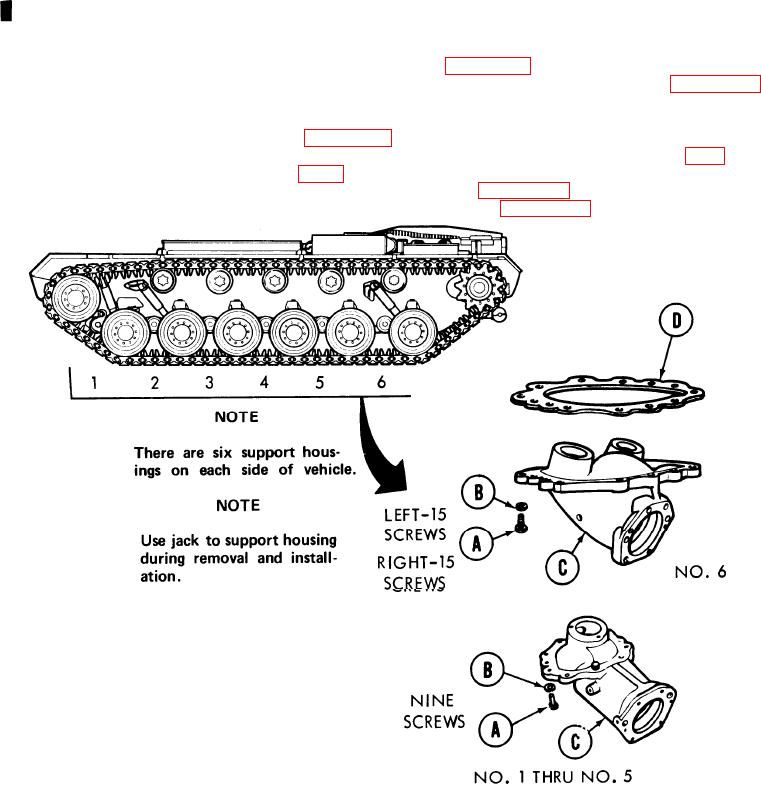
ROADWHEEL SUPPORT HOUSING ASSEMBLY REPAIR AND REPLACEMENT (Sheet 1 of 2)
Adjustable wrench
TOO LS :
1-5/16 in. socket with 3/4 in. drive
Slip joint pliers
Ratchet with 3/4 in. drive
Torque wrench with 3/4 in. drive (0-600 lb-ft)
Hammer
36 in. extension bar
Drift pin punch
SUPPLIES:
Gasket
Grease (Item 37, Appendix D)
Sealing compound (Item 25, Appendix D)
Lockwashers (9 required)
PERSONNEL: TWO
PRELIMINARY PROCEDURES:
Remove roadwheels (page 14-2).
Disconnect No. 1 roadwheel track adjusting link (page 14-75)
(where necessary).
Disconnect shock-absorber at bottom (where necessary)
Remove both torsion bars from left and right side (page
Remove roadwheel arm (page 14-13).
Remove torsion bar anchor (page 14-33) .
REMOVAL:
1. Using socket with ratchet, remove screws
(A) and lockwashers (B) securing roadwheel
support housing (C) to hull.
2. Remove housing (C) and gasket (D) from
hull mounting place. Discard gasket (D).
Go on to Sheet 2
Change 3

