
TM 5-5420-202-20-3
MASTER RELAY ASSEMBLY REPLACEMENT (Sheet 2 of 3)
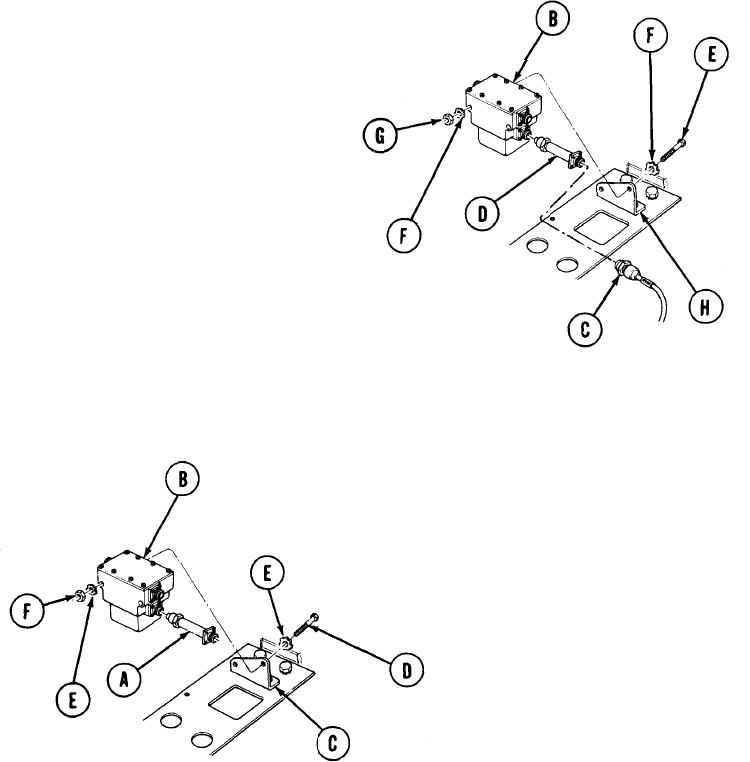
Using 7/8 inch wrench on electrical connector (C)
2.
and adjustable wrench on protection device (D),
remove electrical connector (C) from protection device (D).
Using two 1/2 inch wrenches, remove
3.
two screws (E), four lockwashers (F),
and two nuts (G) securing master relay
(B) to mounting bracket (H).
4.
Remove master relay (B) from mounting
bracket (H).
Using 7/8 inch wrench, remove
5.
protection device (D) from
master relay (B).
INSTALLATION:
1. Using 7/8 inch wrench, install
protection device (A) to master
relay (B).
2.
Position master relay (B) on mounting
bracket (C).
Using two 1/2 inch wrenches, install two
3.
screws (D), four lockwashers (E), and
two nuts (F).
Go on to Sheet 3
TA249080