
TM 5-5420-202-20-3
INTERCONNECTING BOX ASSEMBLY REPAIR (Sheet 1 of 8)
PROCEDURE INDEX
PROCEDURE
PAGE
Disassembly
Assembly
Flat-tip screwdriver
TOOLS:
5/16 in. open end wrench
11/32 in. open end wrench
7/16 in. open end wrench
5/8 in. open end wrench
SUPPLIES:
Glyptol sealer (Item 39, Appendix D)
Lockwashers (24 required)
Remove interconnecting box assembly (page 10-143)
PRELIMINARY
PROCEDURE:
DISASSEMBLY:
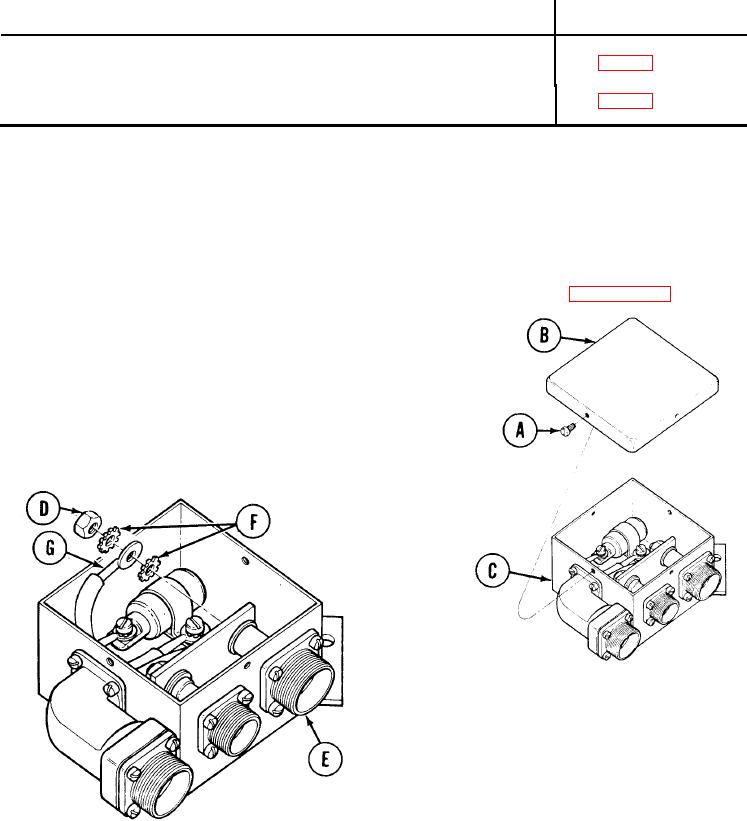
1.
Using screwdriver, remove four
tapping-thread screws (A) securing
cover (B) to box assembly (C).
2.
Remove cover (B) from box assembly
(c).
3.
Using 5/8 inch wrench,
remove nut (D) from receptacle
assembly (E).
4. Remove two lockwashers (F) and
electrical terminal (G) from
receptacle assembly (E).
Go on to Sheet 2
TA249085