
TM 5-5420-202-20-3
UNIVERSAL JOINT REPLACEMENT (Sheet 7 of 7)
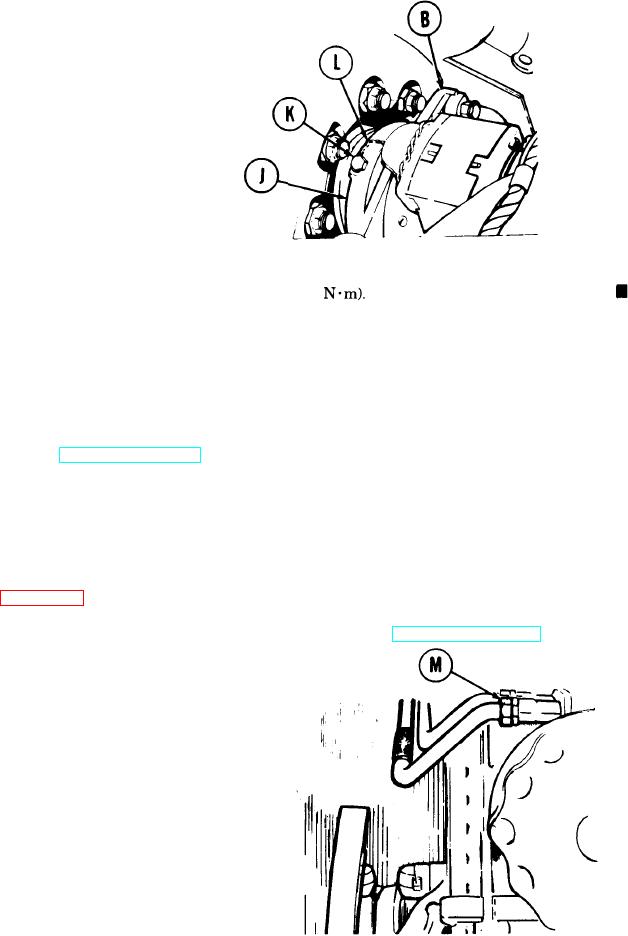
16. Remove rope from universal joint (B).
17. Fit quick-disconnect clamp (J) over grooves
in final drive flange and final drive
adapter assembly.
18. Hold quick-disconnect clamp (J) over
grooves in final drive flange and final drive
adapter assembly.
19. Close quick-disconnect clamp (J).
20. Using extension and 3/4 inch socket, install one screw (K).
21. Using torque wrench, torque screw (K) to 60-120 lb-in (7-14
22. Using slip joint pliers, install lockwire (L) to screw (K) and quick-disconnect clamp (J)
(page C-34).
23. Using 1-1/2 inch wrench, install tube (M) to transmission.
24. Install turbosupercharger outlet elbow (page 7-78).
25. Lubricate universal joint (LO 5-5420-202-12).
26. Install transmission shroud support (page 9-15).
27. Push transmission mounting guide towards transmission and lock into place.
28. Install transmission shroud (page 9-6).
29. Install top deck (page 16-23).
30. Place transmission selector lever in park "P" and apply parking brake (TM 5-5420-202-10).
31. Remove track blocks.
.
End of Task
Change 4