
TM 5-5420-202-20-3
TRACK DRIVE SPROCKET REPAIR AND REPLACEMENT (Sheet 3 of 9)
NOTE
These vehicles may use either one piece nut and bushing
assemblies or two piece nuts and bushings to secure sprocket
and hub assembly to final drive. If one piece do steps 6, 7,
and 11. If two piece do all steps.
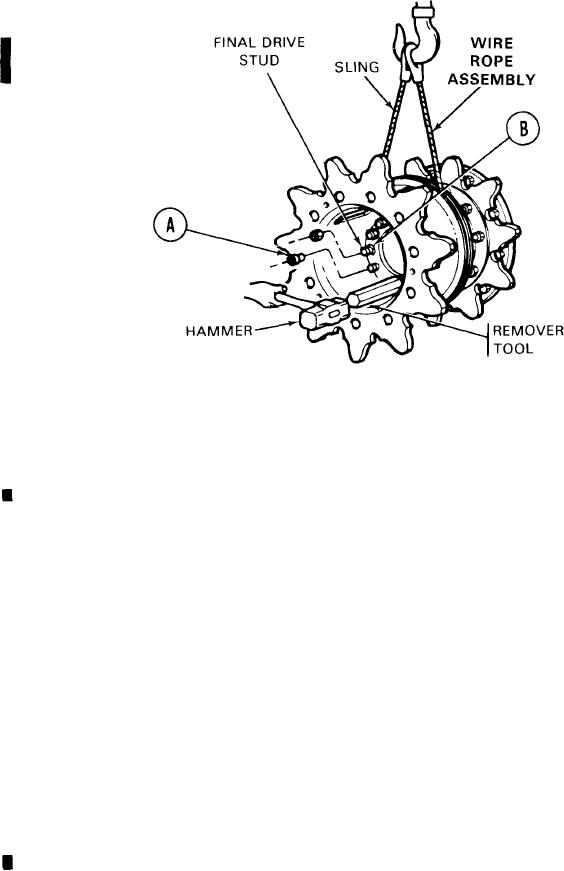
6.
Using 1-1/2 inch socket with extension and handle, remove 10 nuts (A) securing sprocket and hub
assembly to final drive hub.
7.
Throw nuts (A) away.
8.
Thread remover tool tightly onto stud. Using sledge hammer, strike remover tool to
loosen tapered bushing (B) from final drive studs.
9.
Remove tool. Remove bushing.
10.
Do steps 8 and 9 to remove other nine hub tapered bushings (B). Replace bushings if needed.
NOTE
If sprocket has been on hub for long period of time, it may be
necessary to strike it repeatedly with 20 pound sledge
hammer until it becomes unsealed from hub.
11.
Using second person to assist, pull sprocket and hub assembly free of mounting place on
vehicle.
Using hoist and wire rope assembly, move sprocket and hub assembly away from vehicle.
12.
Go on to Sheet 4