
TM 5-5420-202-20-3
COVER ASSEMBLY (ESCAPE HATCH) REPAIR (LATE MODEL) (Sheet 2 of 5)
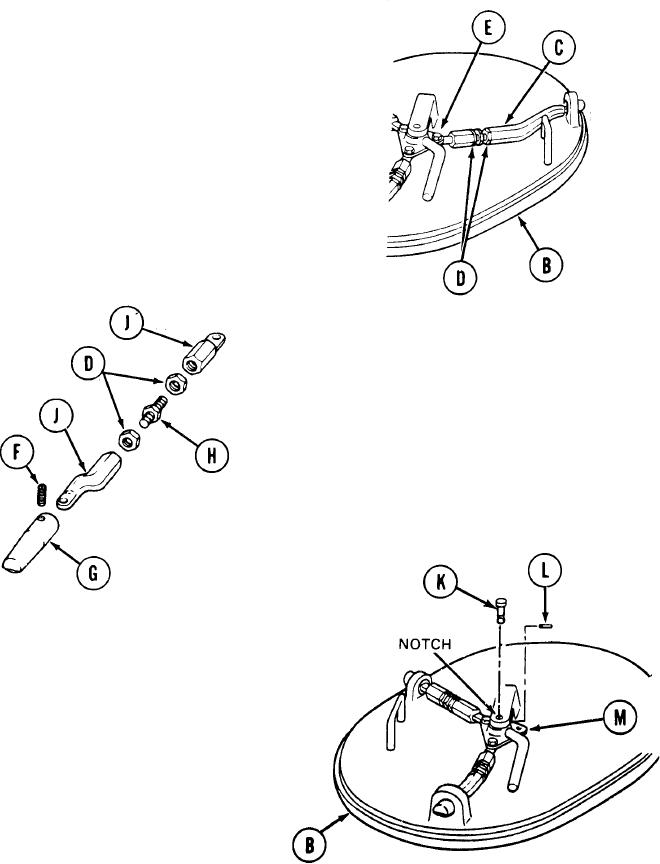
2.
Using adjustable wrench to hold linkage (C), use
3/4 inch wrench and loosen two jam nuts (D).
3.
Using 5/8 inch wrench, remove screw (E)
securing linkage (C) to cover (B).
4.
Remove linkage (C) from cover (B).
5.
Using socket head screw key, remove
screw (F) securing surface bolt (G)
to linkage.
6.
Remove surface bolt (G).
7.
Using 3/4 inch wrench, remove two end
connectors (J) and jamnuts (D) from stud (H).
8.
Using hammer and punch, make a notch on
grooved pin (K) and on cover (B) for alinement
purposes during installation.
9.
Using hammer and punch, drive spring pin (L)
from handle assembly (M). Do not remove.
10.
Remove grooved pin (K) from handle assembly
(M) by pushing up from bottom.
Go on to Sheet 3
TA249711
16-38