
TM 5-5420-202-20-3
FENDER AND SHIELD (REAR) REPLACEMENT (Sheet 4 of 7)
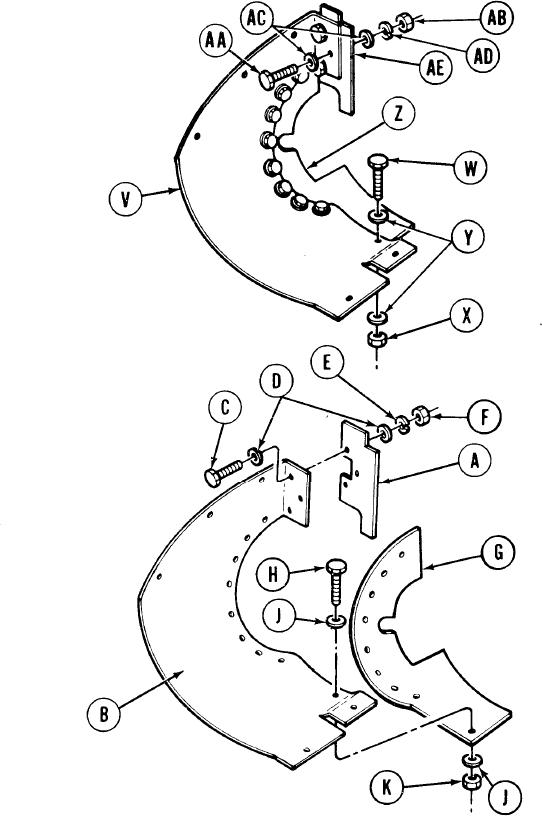
8.
Using 7/16 inch socket on screw (W) and 7/16 inch wrench on nut (X), remove nine screws
(W), washers (Y), and nuts (X) holding anti-squeak (Z) to shield (V). Remove anti-squeak (Z)
from shield (W).
Using 7/16 inch socket on screw (AA) and
9.
7/16 inch wrench on nut (AB), remove three
screws (AA), washers (AC), lockwashers (AD),
and nuts (AB), holding anti-squeak (AE) to
shield (V). Remove anti-squeak (AE) from
shield (V).
INSTALLATION:
1.
Install anti-squeak (A) to shield (B) using three
screws (C), washers (D), lockwashers (E) and nuts
(F).
2.
Using 7/16 inch socket and 7/16 inch wrench,
tighten three screws (C) and nuts (F).
Install anti-squeak (G) to shield (B) using nine
3.
screws (H), washers (J), and locknuts (K).
4.
Using 7/16 inch socket and 7/16 inch wrench,
tighten screws (H) and locknuts (K).
TA249745
Go on to Sheet 5