
TM 5-5420-226-20-2
TM 5-5420-202-34
FUEL TANK (LEFT) REPLACEMENT (Sheet 8 of 16)
NOTE
If fuel tank is to be repaired, go to
page 7-331. If fuel tank is to be
replaced, go to step 31.
Dry cleaning solvent P-D-680 is toxic and flammable. To prevent personal
injury, wear protective goggles and gloves and use only in a well-ventilated
area. Avoid contact with skin, eyes, and clothes and don't breathe vapors.
Do not use near open flame or excessive heat. The flash point for Type #1
Dry Cleaning Solvent is 100F (38C) and for Type #2 is 138F (50C). If you
become dizzy while using cleaning solvent, get fresh air immediately and get
medical aid. If contact with eyes is made, wash your eyes with water and get
medical aid immediately.
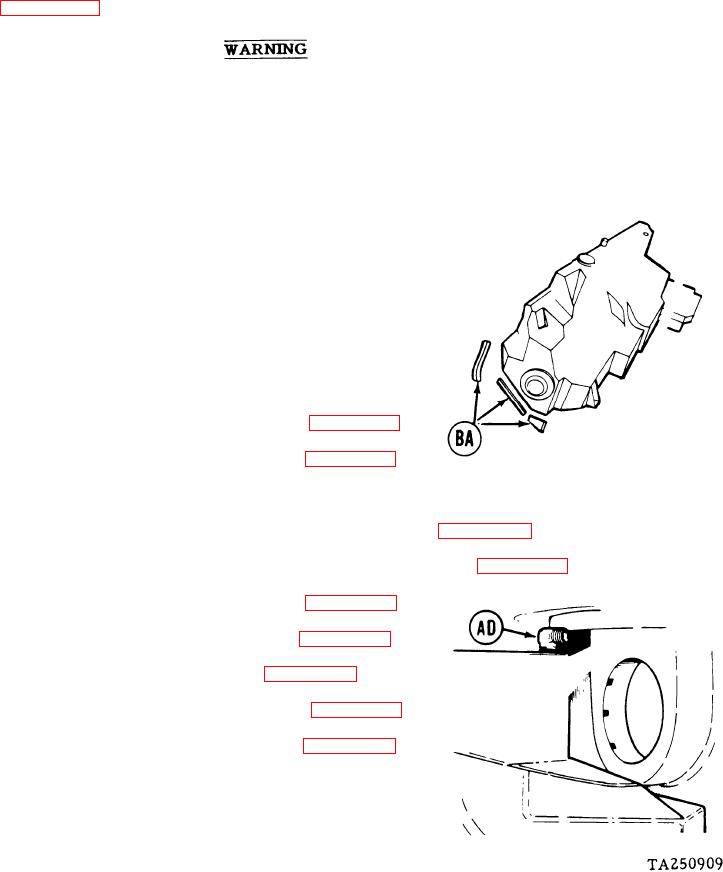
31.
If required, use putty knife and dry cleaning
solvent (Item 55, Appendix D) to remove
seals (BA) from hull. Clean area of all
adhesive and mark area on hull where seals
had been.
Remove fuel tank upper front mount (page 7-388).
32.
Remove fuel tank upper rear mount (page 7-394).
33.
Remove capacitor housing and fuel pump (page 10-321).
34.
Remove emergency filler cover, gasket, and strainer (page 7-139).
35.
Remove fuel tank pipe plug and bracket from top of tank (page 7-131).
36.
Remove condensate plug and outlet (page 7-131).
37.
Remove fuel vent elbow from tank (page 7-153).
38.
Remove fuel level transmitter (page 7-141).
39.
Remove fuel tank lower front mount (page 7-382).
40.
Remove fuel tank lower rear mount (page 7-377).
41.
Using 7/8 inch wrench, remove fuel vent elbow (AD).
42.
Go on to Sheet 9
Change 6
7-3931
4-5