
TM 5-5420-202-3420-2
TM 5-5420-226-
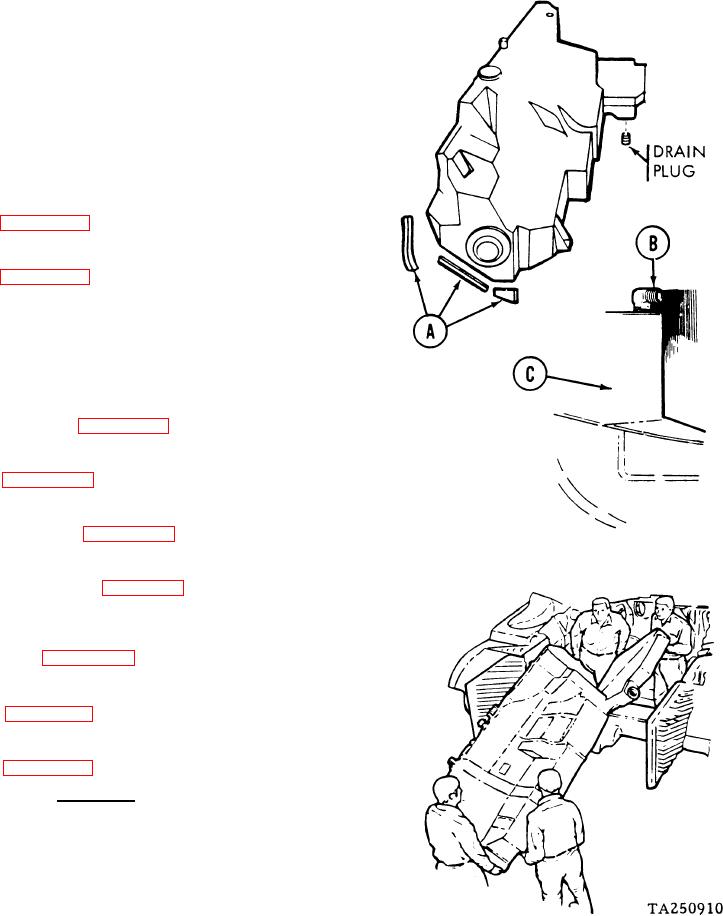
FUEL TANK (LEFT) REPLACEMENT (Sheet 9 of 16)
INSTALLATION:
NOTE
If fuel tank was removed for repair,
go to step 12. If fuel tank to be
replaced is a new tank, go to step 2.
1.
If required, use adhesive (Item 4, Appendix D
to install new seals (A) in marked
positions on hull.
2.
Install upper front mount on fuel tank
3.
Install upper rear mount on fuel tank
4.
Apply sealing compound (Item 23, Appendix D
to male threads of fuel vent elbow (B),
and using adjustable wrench, install
and position elbow (B) in tank (C) as shown.
5.
Install condensate outlet and plug in
fuel tank (page 7-178).
6.
Install fuel level transmitter in fuel tank
7.
Install emergency filler strainer, gasket
and cover (page 7-139).
8.
Install fuel pump and capacitor housing
in fuel tank (page 7-16).
Install plug and bracket on top of fuel
9.
tank and drain plug in the side of fuel
tank (page 7-152).
10.
Install lower front mount on fuel tank
11.
Install lower rear mount on fuel tank
CAUTION
Do not use pry bars or wood poles to
force fuel tank into place. Take
care not to scrape, puncture, or
otherwise damage tank.
12.
Using four persons, place fuel tank into the vehicle.
Go on the hvehicle.
to S eet 10
Go on to Sheet 10
4-396 Change 6
7-32