
TM 5-5420-226-20-3
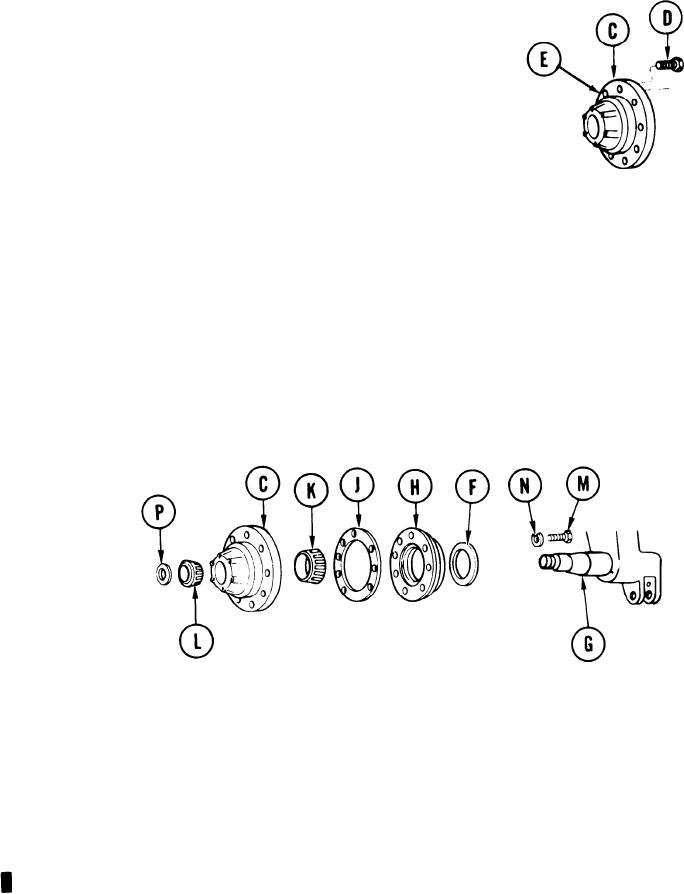
HUB ASSEMBLY REPLACEMENT (Sheet 5 of 7)
4. Using hammer and drift punch, install new
bolts (D) into hole (E) of hub (C) (if required).
5.
Grease new preformed packingInstall packing (F) into groove on arm assembly (G).
6. Install seal assembly (H) with new gasket (J) onto arm assembly spindle (G).
7. Pack both inner and outer bearings (K and L) with grease.
a. Position inner bearing (K) on arm assembly spindle (G).
9. Install hub (C) onto arm assembly spindle (G), making sure seal assembly (H) alines to five
pins on interface of arm assembly spindle (G).
10. Install eight screws (M) and lockwashers (N) to secure seal assembly (H) to hub (C).
11. Using 9/16 inch socket, tighten screws (M) alternately.
12. Install outer bearing (L) onto spindle. Push hub (C) onto spindle and bearing (L) until
bearing seats.
Install round nut (P) with dowel. Using face wrench socket with 3/4 inch drive ratchet,
13.
tighten nut (P) while rotating hub (C) one way, then opposite.
Go on to Sheet 6
14-10 Change 3