TM 5-5420-227-24
LOCKING CYLINDER REPLACEMENT (Sheet 2 of 3)
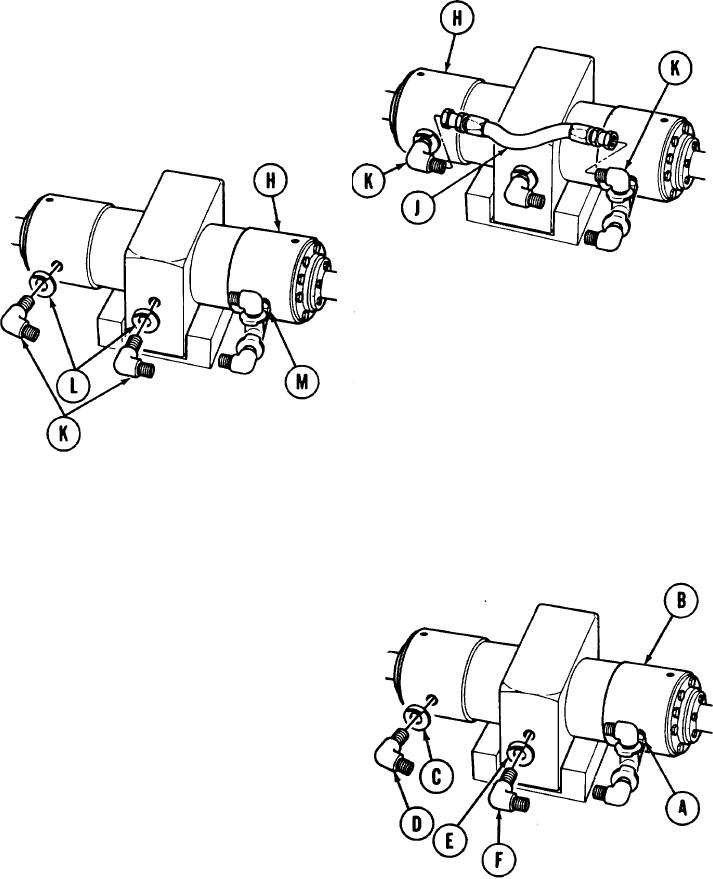
Remove locking cylinder (H) from vehicle.
8.
Using 7/8 inch wrench, remove hose
9.
assembly (J) from two elbows (K).
10.
Using 3/4 inch wrench, remove two elbows
(K) and collars (L) from locking cylinder (H).
11.
Using 3/4 inch wrench, remove nipple (M)
and its attached parts from locking cylinder
(H).
12.
Put protective covering on all hydraulic
parts.
Remove container and throw away drained
13.
fluid.
INSTALLATION:
NOTE
Remove protective covering and put pipe tape on ail male dreads of hydraulic
fittings.
1.
Using 3/4 inch wrench, install nipple (A) and
its attached parts on locking cylinder (B).
NOTE
Collar (C), marked "M" is used with
elbow (D) and collar (E), marked "CE2"
is used with elbow (F).
2.
Using 3/4 inch wrench, install two elbows
(D, F) and collars (C, E).
TA170457
Go on to Sheet 3
3-235

