
TM 5-5420-202-20-3
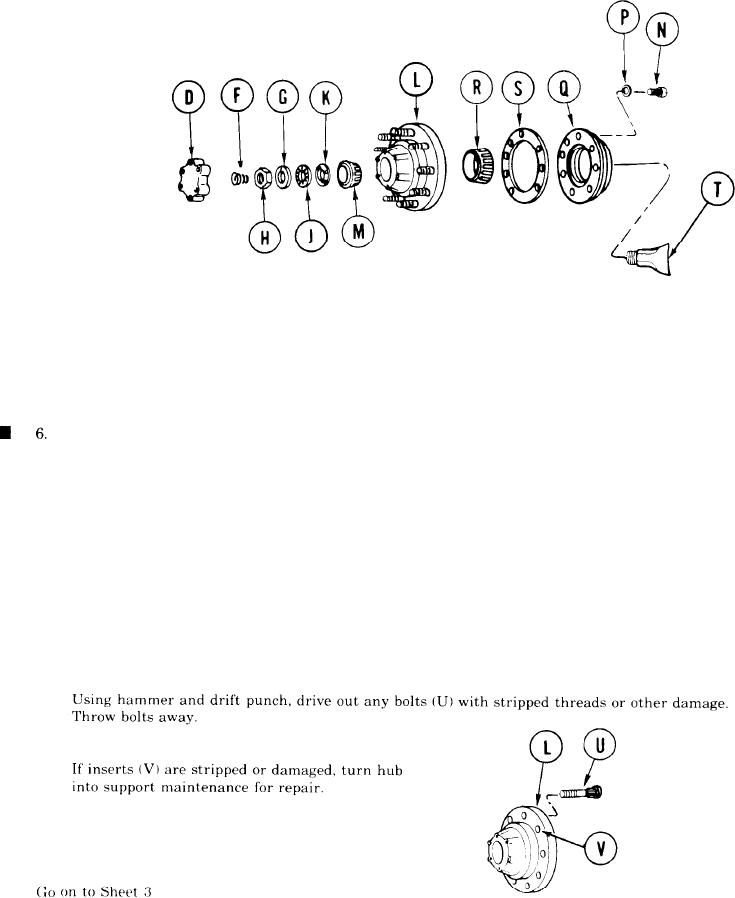
HUB ASSEMBLY REPLACEMENT (Sheet 2 of 7)
3.
Remove spring (F) from inside of cover plate (D).
4.
Using hammer and drift punch, bend back tab of bearing nut lock (G).
.5.
Using 2-1/2 inch socket, loosen nut (H). Remove nut (H), bearing nut lock (G), and lock (J).
Throw bearing nut lock (G) away if used more than four times.
Using socket wrench with 3/4 inch ratchet, remove nut (K).
Using pinch bar on hub, if necessary, remove hub (L) and bearing (M).
7.
Using 9/16 inchsocket with hinged handle, remove eight screws (N) and lockwashers (P)
8.
securing seal assembly (Q) to hub (L).
9.
Remove inner bearing (R), gasket (S), and seal assembly (Q). Throw gasket away.
Separate preformed packing (T) from arm assembly. Throw packing away.
10.
11.
12.
14-16
Change 4