
TM 5-5420-226-20-3
ELECTRICAL WIRING HARNESS AND CABLE CONNECTOR REPAIR (Sheet 16 of 18)
Female Receptacle Repair (Sheet 1 of 3)
Electrical connector repair tool kit
TOOLS:
Soldering gun
Slip joint pliers with plastic jaw inserts
Diagonal cutting pliers
Pocket knife
Heat gun
Silicone compound (Item 32, Appendix D)
SUPPLIES:
Heat-shrink tubing (Item 60, Appendix D)
Electrician's tape (Item 59, Appendix D)
Jumper wire
Disconnect three battery ground straps (page 10-268)
PRELIMINARY PROCEDURES:
Loosen or remove cable clamps as required
Disconnect connectors at each end of affected cable
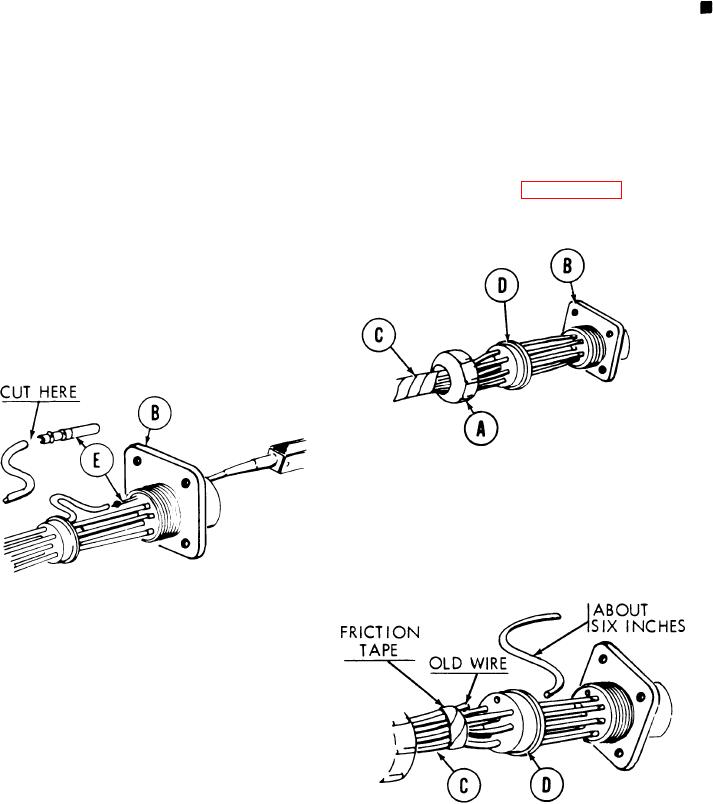
Manually remove grommet retaining nut
1.
(A) from plug assembly (B).
Slide grommet retaining nut (A) back along
2.
cable (C).
3.
Using slip joint pliers, work grommet (D)
back and forth and out of plug assembly
(B).
4.
Using remover, push contact (E) with
damaged wire out of back of plug
assembly (B).
5.
Using diagonal cutting pliers, cut wire
from contact (E). Throw away contact (E).
Pulling cut wire out of grommet (D), use
6.
diagonal cutting pliers to shorten wire
about 6 inches. Fasten new end of cut wire
to cable (C) with friction tape.
Go on to Sheet 2
10-313