
TM 5-5420-202-20-2
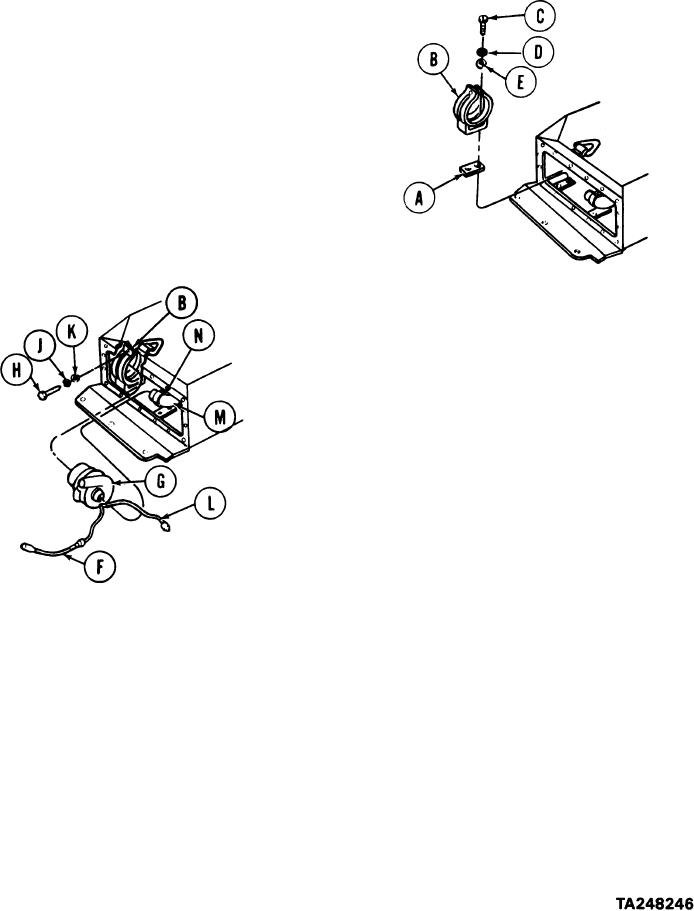
AIR CLEANER (ALUMINUM) CENTRIFUGAL FAN REPLACEMENT (Sheet 5 of 6)
INSTALLATION:
1.
Position pad (A) and bracket (B) in housing.
2.
Coat threads of two screws (C) with sealer
and install two screws (C), lockwashers
(D), and washers (E) to secure bracket (B).
3.
Using 9/16 inch socket, tighten screws (C).
4.
Connect jumper lead (F) to longer centrifugal
fan lead.
5.
Position centrifugal fan (G) into bracket (B).
6.
Position bracket (B) around centrifugal fan (G) and install two screws (H), lockwashers
(J), and washers (K) to secure band.
7.
Using 1/2 inch socket, tighten screws (H).
8.
Connect short electrical lead (L) of centrifugal fan to ground lead.
Connect hose (M) to inlet port of centrifugal fan (G).
9.
10.
Slide hose clamp (N) over hose (M) and inlet port of centrifugal fan (G).
11.
Using screwdriver, tighten nut of clamp (N).
Go on to Sheet 6