
TM 5-5420-202-20-3
LEFT AND RIGHT FINAL DRIVE REPLACEMENT (Sheet 3 of 4)
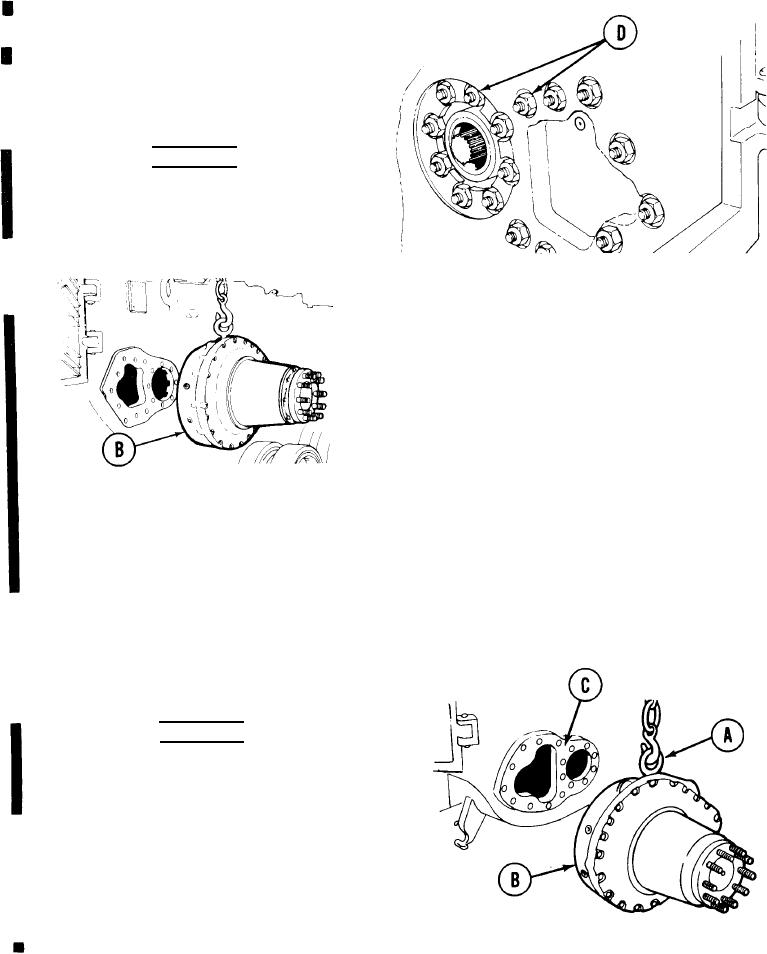
9.
Using hand impact wrench set, remove 17 self-
locking nuts (D) holding final drive (B) to hull.
Throw self-locking nuts (D) away.
WARNING
Do not place hands under final drive (B)
or between final drive (B) and hull
(C). Injury to personnel may occur if
final drive (B) inadvertently shifts.
Keeping hoist chain tight, slowly pull final
10.
drive (B) from hull.
NOTE
If final drive cannot be pulled free from
hull, do step 10.1.
10.1.
Using pinch bar, pry final drive (B) away from
hull and slowly pull final drive (B) from hull
11.
Using hoist, slowly lower final drive (B) to a
INSTALLATION:
solid surface.
If lifting eye (A) is not installed in final drive (B), use socket handle wrench and remove plug from
1.
eyehole in final drive (B).
Using hoist, attach hook to lifting eye (A) on final drive (B). Using pinch bar, through lifting eye,
tighten lifting eye (A).
3.
Using hoist, attach hook to lifting eye (A) on final drive (B). Take slack out of hoist chain.
4.
Using brush and sealing compound, coat final
drive mating surface on hull (C).
WARNING
Do not place hands under final drive (B)
or between final drive (B) and hull
(C). Injury to personnel may occur if
final drive (B) inadvertently shifts.
5.
Using hoist, lift final drive (B) and position
it so that studs are in alinement with
mating surface on hull (C).
Go on to Sheet 3.1