
TM 5-5420-202-20-3
BELLCRANK REPLACEMENT (Sheet 3 of 4)
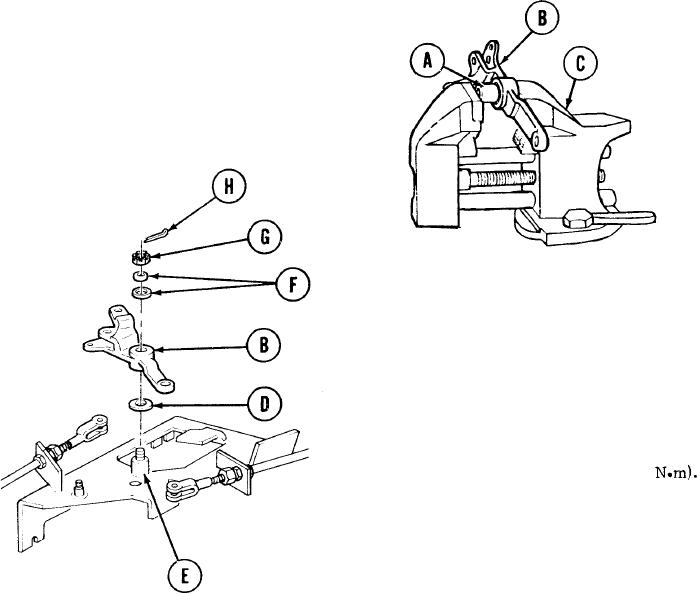
INSTALLATION:
Place new bushing (A) in position in
1.
bellcrank (B).
Using vise (C) with vise jaw caps on
2.
jaws, press bushing (A) into bellcrank
(B).
Place flat washer (D) and bellcrank
3.
(B) in position on control bracket stud
(E).
Place two flat washers (F) and nut (G)
4.
in position on top of bellcrank (B) and
onto control bracket stud (E).
5.
Using 9/16 inch socket and torque wrench,
tighten nut (G) to 19-21 lb-ft (26-28
Aline slot of nut (G) with hole of control bracket stud (E).
6.
Using pliers, install new cotter pin (H). Bend cotter pin (H) so that it will not fall out.
7.
TA249514
Go on to Sheet 4