
TM 5-5420-226-20-2
1/2 in. socket with 1/2 in. drive
TOOLS
5 in. extension with 1/2 in. drive
Ratchet with 1/2 in. drive
1/2 in. combination box and open end wrench
3/4 in. combination box and open end wrench
PRELIMINARY PROCEDURES:
Remove powerplant (page 5-2)
NOTE
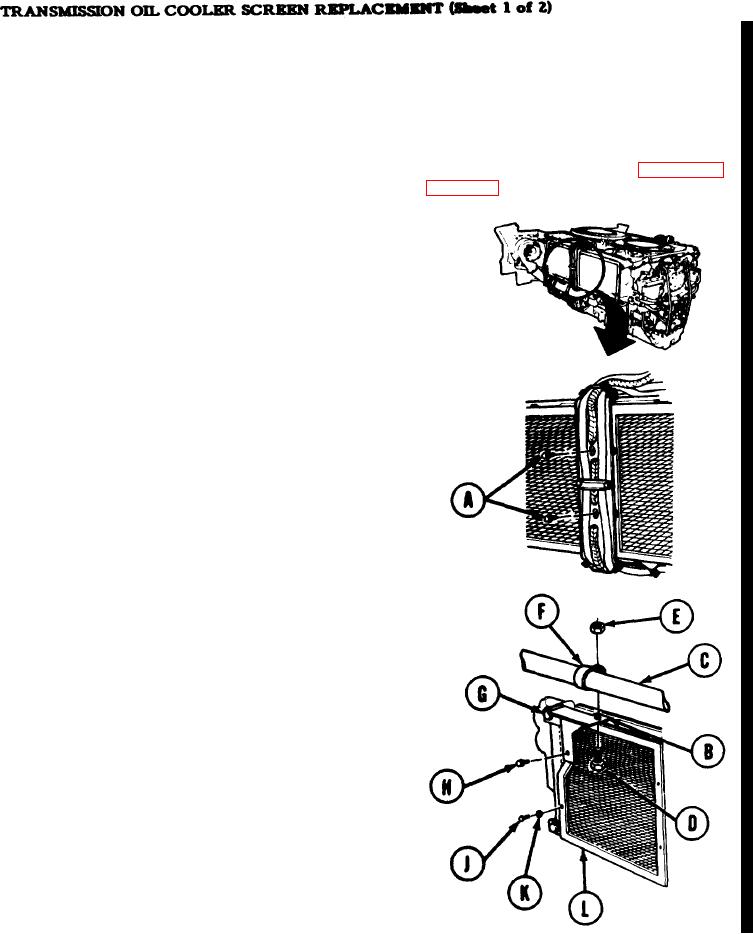
Left aide shown, right aide similar.
REMOVAL:
NOTE
If removing 2D engine screen go to step 6.
Using socket, extension, and ratchet through
1.
harness and into bracket, remove two
assembled washer screws (A).
NOTE
You will have bracket (B) and tube
(C) only if yuur vehicle is equipped
with a 2DA engine.
Using socket and 1/2 inch
2.
wrench, remove screw (D) and locknut (E)
securing clamp (F) and tube (C) to bracket (B).
3.
Using 3/4 inch wrench, remove bolt (G).
Using socket, remove assembled washer screw
4.
(H ), screw (J), and washer (K) securing bracket
(B) and oil cooler screen (L).
5.
Remove bracket (B) and oil cooler screen (L).
For 2A engine; using socket, remove four
6.
screws (J) and four washers (K) securing oil
cooler screen (L). Remove oil cooler screen
(L).
Go on to Sheet 2
Change 2
6-53