TM 5-5420-226-20-3
ELECTRICAL WIRING HARNESS AND CABLE CONNECTOR REPAIR (Sheet 1 of 18)
PAGE
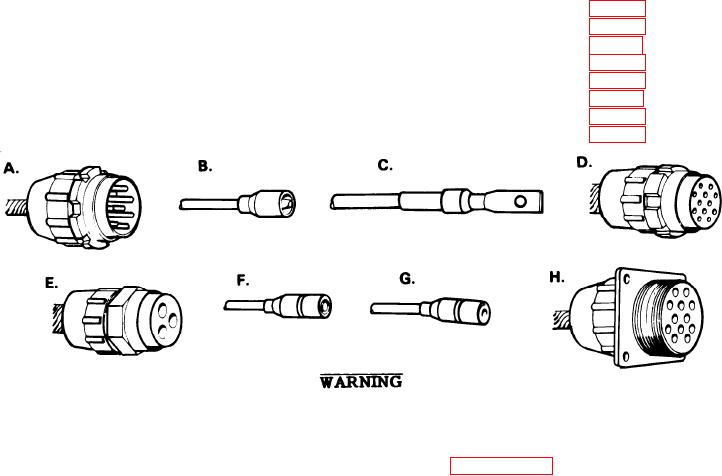
PROCEDURE INDEX
A.
Male Plug Repair
B.
Male Connector Repair
Terminal Connector Repair
C.
D.
Female Plug Repair
E.
Female Plug Repair
Female Connector With Washer (12 Gage Cable) Repair
F.
Female Connector With Sleeve (14 and 16 Gage Cable) Repair
G.
H.
Female Receptacle Repair
Some wiring harness and cables are hot even if MASTER
BATTERY switch is set to OFF. Make sure the three
disconnected before
battery ground cable assemblies are
disconnecting any wiring harness or cable (page 10-268).
NOTE
When replacing a bad pin or contact, the opposite pin or
contact at the other end of the cable must also be replaced.
Do not disassemble the harness. Use a jumper wire of the
same gage wire being replaced, cut to the length of the
affected cable. When repairs to both connectors com-
plete, tape the jumper wire to the outside of the cable with
friction tape. The jumper wire should be taped at least
every 6 to 8 inches, but in no case should any part of the
wire be allowed to hang loose.
NOTE
After a plug, receptacle, or connector in the engine com-
partment has been repaired and the cable or jumper wire has
been installed brush or spray the cable or jumper wire with
electrical insulating compound. allow the compound to dry
for about 24 hours before handling. the compound is an
insulator of electricity, so care must be to to keep from
overspraying the compound on contacting surfaces of wire
terminals, connector pins or contacts, or similar parts where
it will prevent the flow of electricity.
Go on to Sheet 2
Change 1

