TM 5-5420-228-24
CLUTCH ASSEMBLY REPLACEMENT AND REPAIR (Sheet 3 of 9)
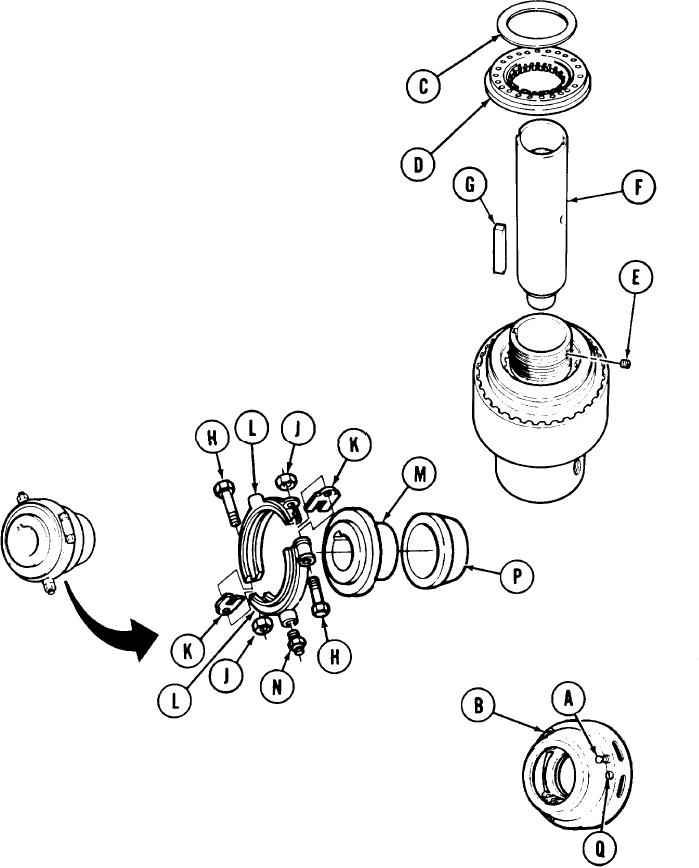
Manually remove bearing (C) and gear (D).
3.
Using 1/4 inch screw key, loosen setscrew (E).
4.
5.
Manually pull out shaft (F).
Using pliers, remove key (G).
6.
Holding two screws (H) with 9/16 inch
7.
wrench, use 9/16 inch wrench to remove
two nuts (J).
Manually remove two screws (H) and
8.
shims (K).
Separate two halves of collar (L) and
9.
remove from sleeve (M).
10.
Using 7/16 inch wrench, remove lubrication
fitting (N).
11.
Using arbor press, remove sleeve (M)
from ring (P).
Remove locating pin from pin (A).
12.
Using flat-tip screwdriver, remove three screws (Q) securing cover (B) to attached
13.
parts.
TA251686
G O on to Sheet 4
4-35

