
TM 5-5420-228-24
CLUTCH ASSEMBLY REPLACEMENT AND REPAIR (Sheet 5 of 9)
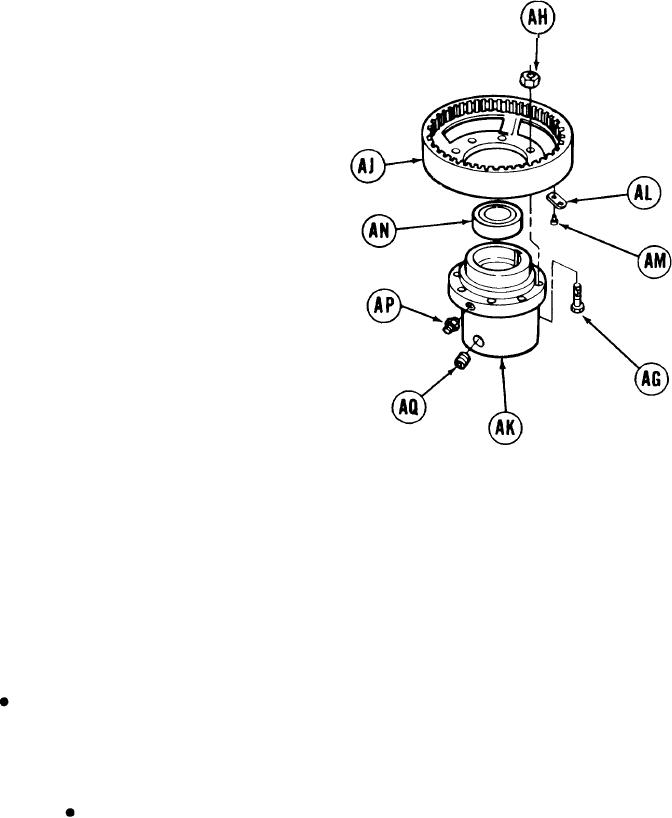
Using 9/16 inch wrench to hold screws (AG),
25.
use 9/16 inch socket to remove eight nuts (AH).
Using hammer, tap out screws (AG)
26.
from flange (AJ).
Remove flange (AJ) from hub (AK).
27.
Using hammer and chisel, under nameplate (AL), remove two drive screws AM) and
28.
nameplate (AL). Throw drive screws (AM) away.
Using bearing puller, remove bearing (AN) from hub (AK).
29.
30.
Using 7/16 inch wrench, remove lubrication fitting (AP).
Using 3/8 inch screw key, remove setscrew (AQ).
31.
CLEANING AND INSPECTION:
WARNING
Cleaning agent specified is flammable. Use only in well ventilated areas. Keep away
from flames, sparks, or heat. Do not smoke while using. Prevent contact with eyes,
mouth, and/or skin. Wear rubber gloves when performing cleaning procedures.
Compressed air used for cleaning purposes will not exceed 30 psi.
Use only with effective chip guarding and personal protective
equipment goggles/shield, gloves, etc.
1.
Using rags and dry cleaning solvent, clean all metal parts and dry with compressed air.
2.
Lubricate bearings with grease and wrap in oiled paper.
TA251688
Go on to Sheet 6