
TM 5-5420-202-20-2
ENGINE OIL COOLER (LEFT AND RIGHT) REPLACEMENT (Sheet 2 of 6)
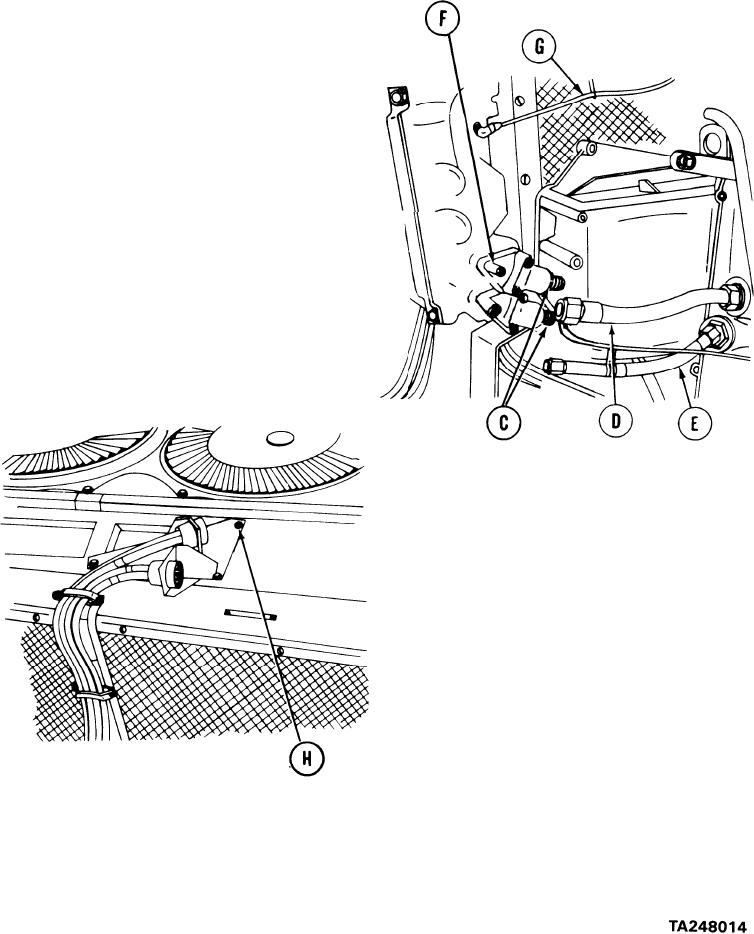
Put drip pan on flat surface under oil cooler
3.
connectors (C).
4.
Using 1-1/2 inch wrench, remove hose (D)
at oil cooler connectors (C).
5.
Using 1-1/2 inch wrench, remove hose (E)
at oil cooler connectors (C).
6.
Using 1/2 inch socket, remove six nuts (F)
securing two oil cooler connectors (C).
7.
Remove two oil cooler connectors and gaskets
(C). Throw gaskets away.
8.
Using plastic material and
masking tape, wrap ends of
hose (D and E) and oil cooler
connectors (C) to keep them
clean and from dripping.
Using 9/16 inch wrench, remove
9.
oil cooler vent hose (G) at
top of cooler.
10.
Using 1/2 inch socket, remove four screws
and lockwashers (H).
Go on to Sheet 3
6-20