
TM
5-5420-202-20-2
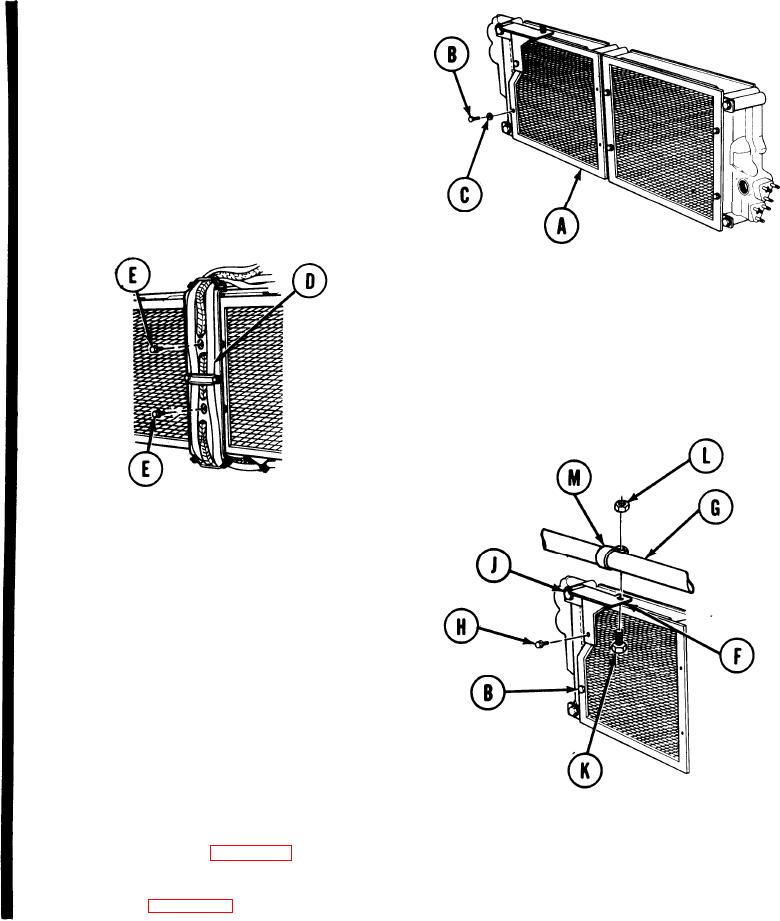
TRANSMISSION OIL COOLER SCREEN REPLACEMENT (Sheet 2 of 2)
INSTALLATION:
NOTE
For 2A engine screen, do step 1,
2, 10, and 11.
Position oil cooler screen (A) into place
1.
on oil cooler.
For 2D engine, install screw (B) and
2.
washer (C). For 2A engine, use socket to install
and tighten four screws (B) and washers (C).
Position harness and bracket (D) into
3.
place on oil cooler.
4.
Using socket, extension, and ratchet
through harness and into bracket,
install two assembled washer screws
(E).
NOTE
You will have bracket (F) and tube
(G) only if your vehicle is equipped
with a 2DA engine.
5.
Position bracket (F) to oil cooler.
6.
Install assembled washer screw (H).
7.
Using socket, tighten screws (B) and (H).
8.
Using 3/4 inch wrench, install bolt (J).
Using socket and 1/2
9.
inch wrench, install screw (K) and nut (L)
to secure clamp (M) and tube (G) to
bracket (F).
10.
Install powerplant (page 5-14).
11.
Install both air cleaner outlet hose
assemblies (page 7-86).
End of Task
Change 1