
TM 5-5420-202-20-2
AIR CLEANER (ALUMINUM) CENTRIFUGAL FAN POWER LEAD REPLACEMENT (Sheet 3 of 4)
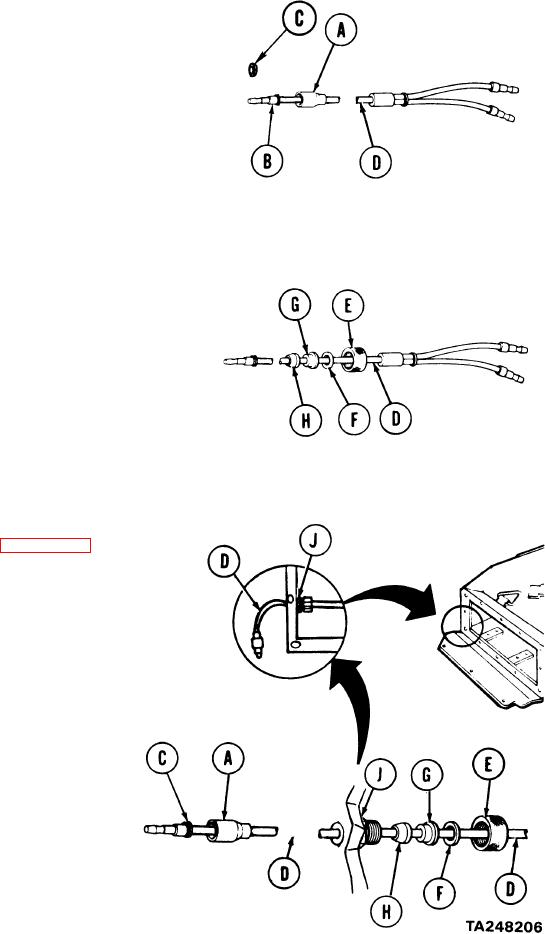
INSTALLATION:
1.
Push shell (A) back away from contact (B).
2.
Remove washer (C) from lead (D). Remove
shell (A).
3.
Install the following parts onto lead (D):
nut (E), washer (F), washer (G), and new
gasket (H).
4.
Install lead (D) through adapter (J). Pull
approximately 10 inches of lead out of adapter.
5.
Install shell (A) over end of lead and install
washer (C).
6.
Pull shell (A) toward end until it is stopped
by washer.
7.
Push gasket (H) and washers (G and F) down
in adapter (J).
8.
Thread nut (E) onto adapter (J). Using pliers,
tighten nut.
Install centrifugal fan (page 7-122).
9.
Go on to Sheet 4