
TM 5-5420-202-34
FINAL DRIVE REPAIR (Sheet 23 of 30)
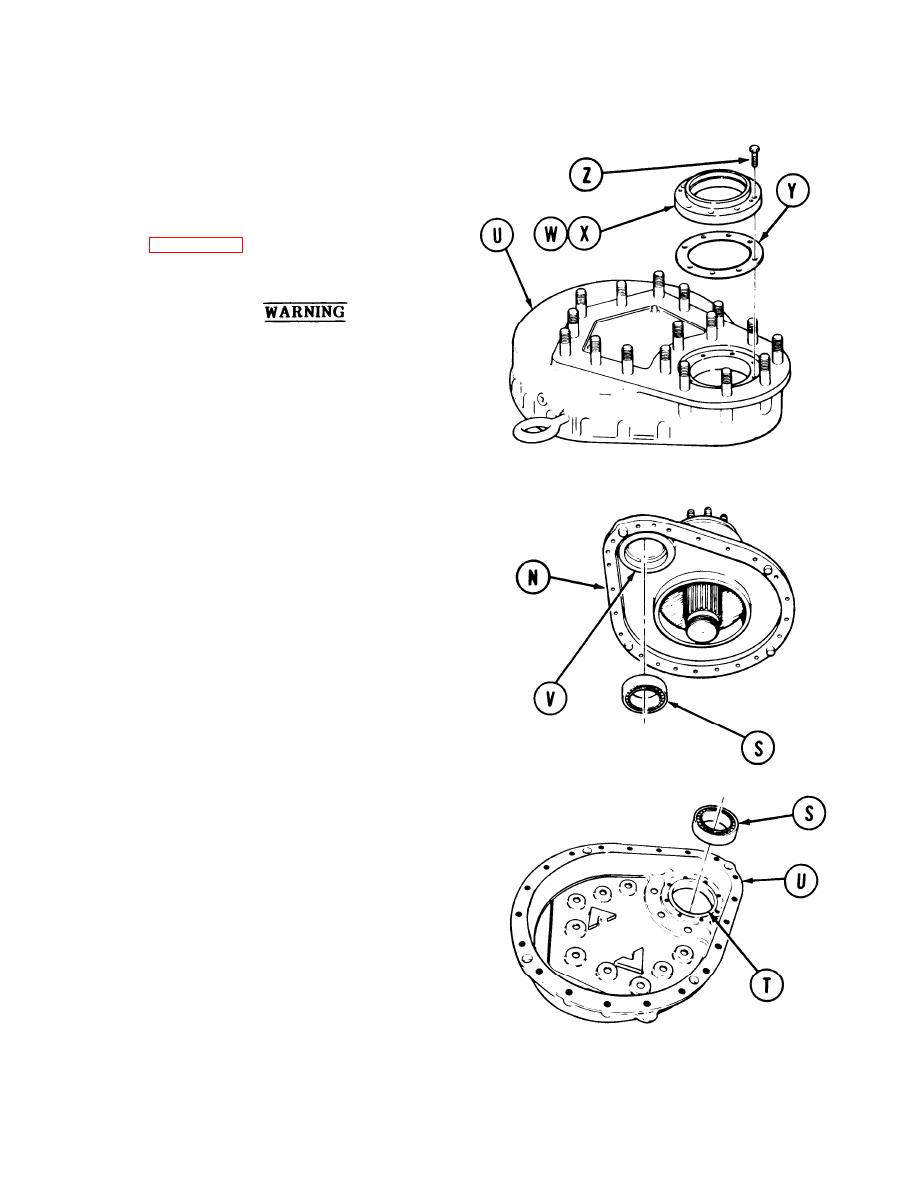
Position new gasket (Y) and assembled
36.
cap (W) and seal (X) on case (U).
Apply primer to all threaded holes in
37.
case (U).
Apply sealing compound (Item 7,
38.
(Z). Using 3/4 inch socket, install eight
screws (Z) to secure cap (W).
Wear gloves when handling
frozen parts to prevent serious
injury to your hands.
Remove one bearing (S) from refrigerant
39.
and quickly install in carrier (N) bearing
pocket (V). Ensure bearing (S) is seated
in bearing pocket (V).
Remove second bearing (S) from refriger-
40.
ant and quickly install in case (U) bearing
bore (T). Ensure bearing (S) is seated in
bearing bore (T).
41.
Using inspection mirror, ensure bearings
(S) are fully seated in bearing pocket (V)
and bearing bore (T). If bearings (S) are
seated, go to step 43. If bearings (S) are
not seated, go to step 42.
If bearing (S) is not seated in carrier (N),
42. .
using bearing mechanical puller kit, re-
move bearing (S) from carrier (N). Repeat
steps 33, 39, and 41. If bearing (S) is not
seated in case (U), using universal mech-
anical puller, remove bearing (S) from case
(U). Repeat steps 33, 40, and 41.
CAUTION
If staking of bearing (S) is required,
do not hit bearing with punch or
hammer.
Damage to bearing (S)
could result.
43.
Check bearing (S) for looseness. If loose,
using hammer and center punch, stake
bearing (S) pocket in three places to hold
bearing (S) in place during assembly.
Go on to Sheet 24
Change 2
7-23
